
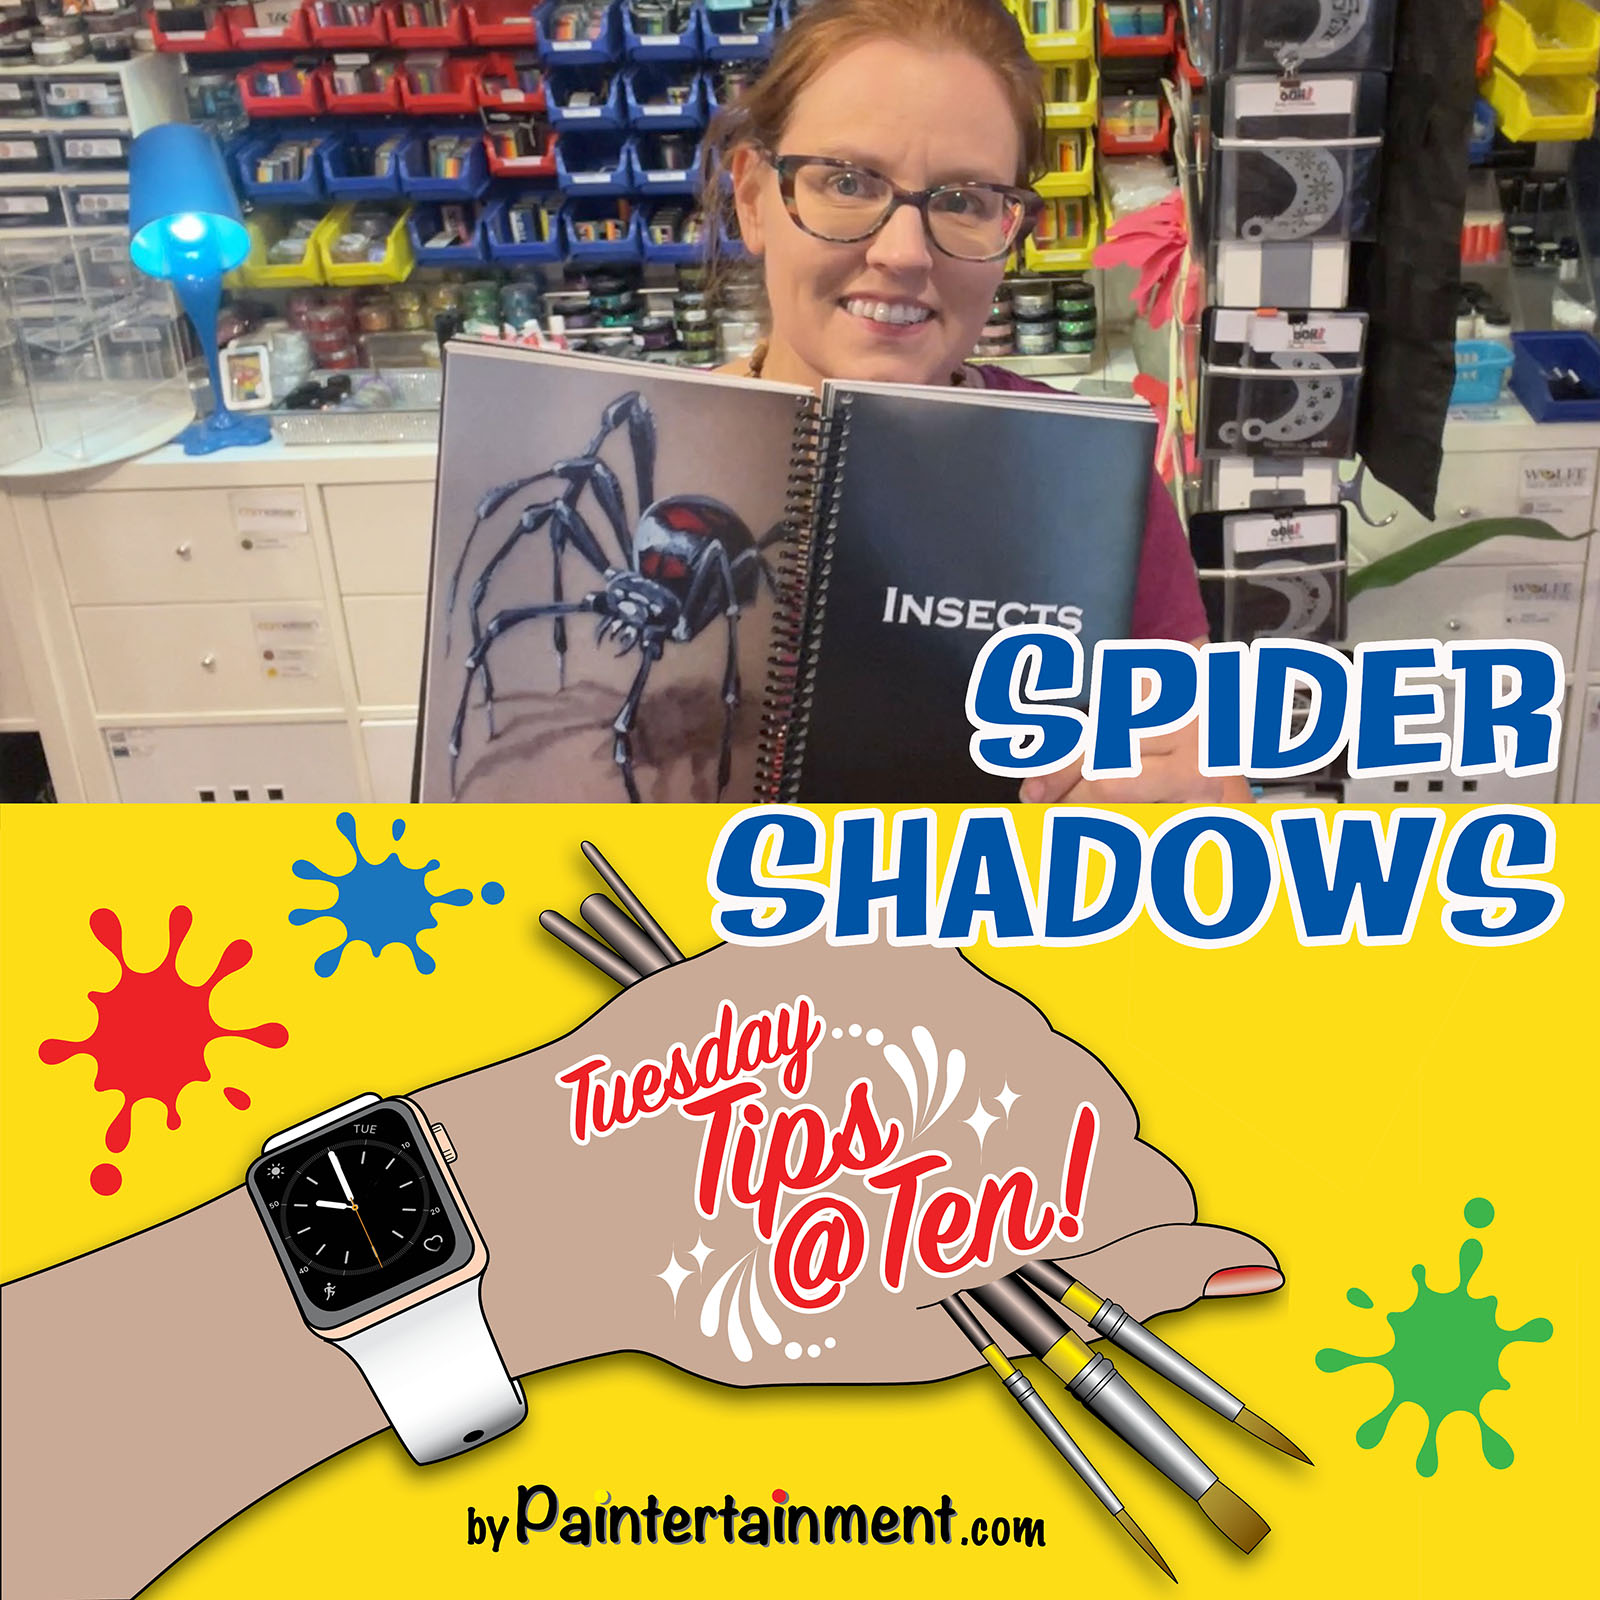

Happy Tuesday! Here’s a tip for shading those spindly spider legs!
-
 Cameleon Blending Brush$11.00 – $12.00
 -
 Realism for Face And Body Artists$32.99
Halloween designs
Happy Tuesday! Here’s a tip for shading those spindly spider legs!


This one looks really detailed but stencils make it super quick! First I laid down a base with a sponge and a Tiger cake for a sunset background. Next, I used an Ooh! zombie arm stencil and mini kabuki brush to add the arms! The branches are actually done with a Christmas stencil that we sell. Then, using a round brush loaded with black, I added a little hanging bat in a tree (totally optional), some scraggly looking grass, and used a dry Cameleon blending brush to drag it down and fade into the forehead. The blood splatters I did using just a portion of a BAM 1415 splatter skull stencil, and then topped that off with some liquid bling!
I’m SOOOO upset right now that my most FAVORITE mini kabuki stencil brush has been discontinued by the manufacturer…I am working on sourcing some new ones and hope to have them up on the site SOON! Follow our Facebook page for updates! They are an absolute game changer for me when it comes to stencils…stay tuned on that!


Here’s another quick line buster design for Halloween…a butterfly-like spider design! First, lay down a base of your favorite tiger split cake with a petal sponge. Then, add some quick webs with black and a round brush. Use a spider stencil too if you like! Finish it off with some white highlights and Vivid Gleam orange glitter cream!


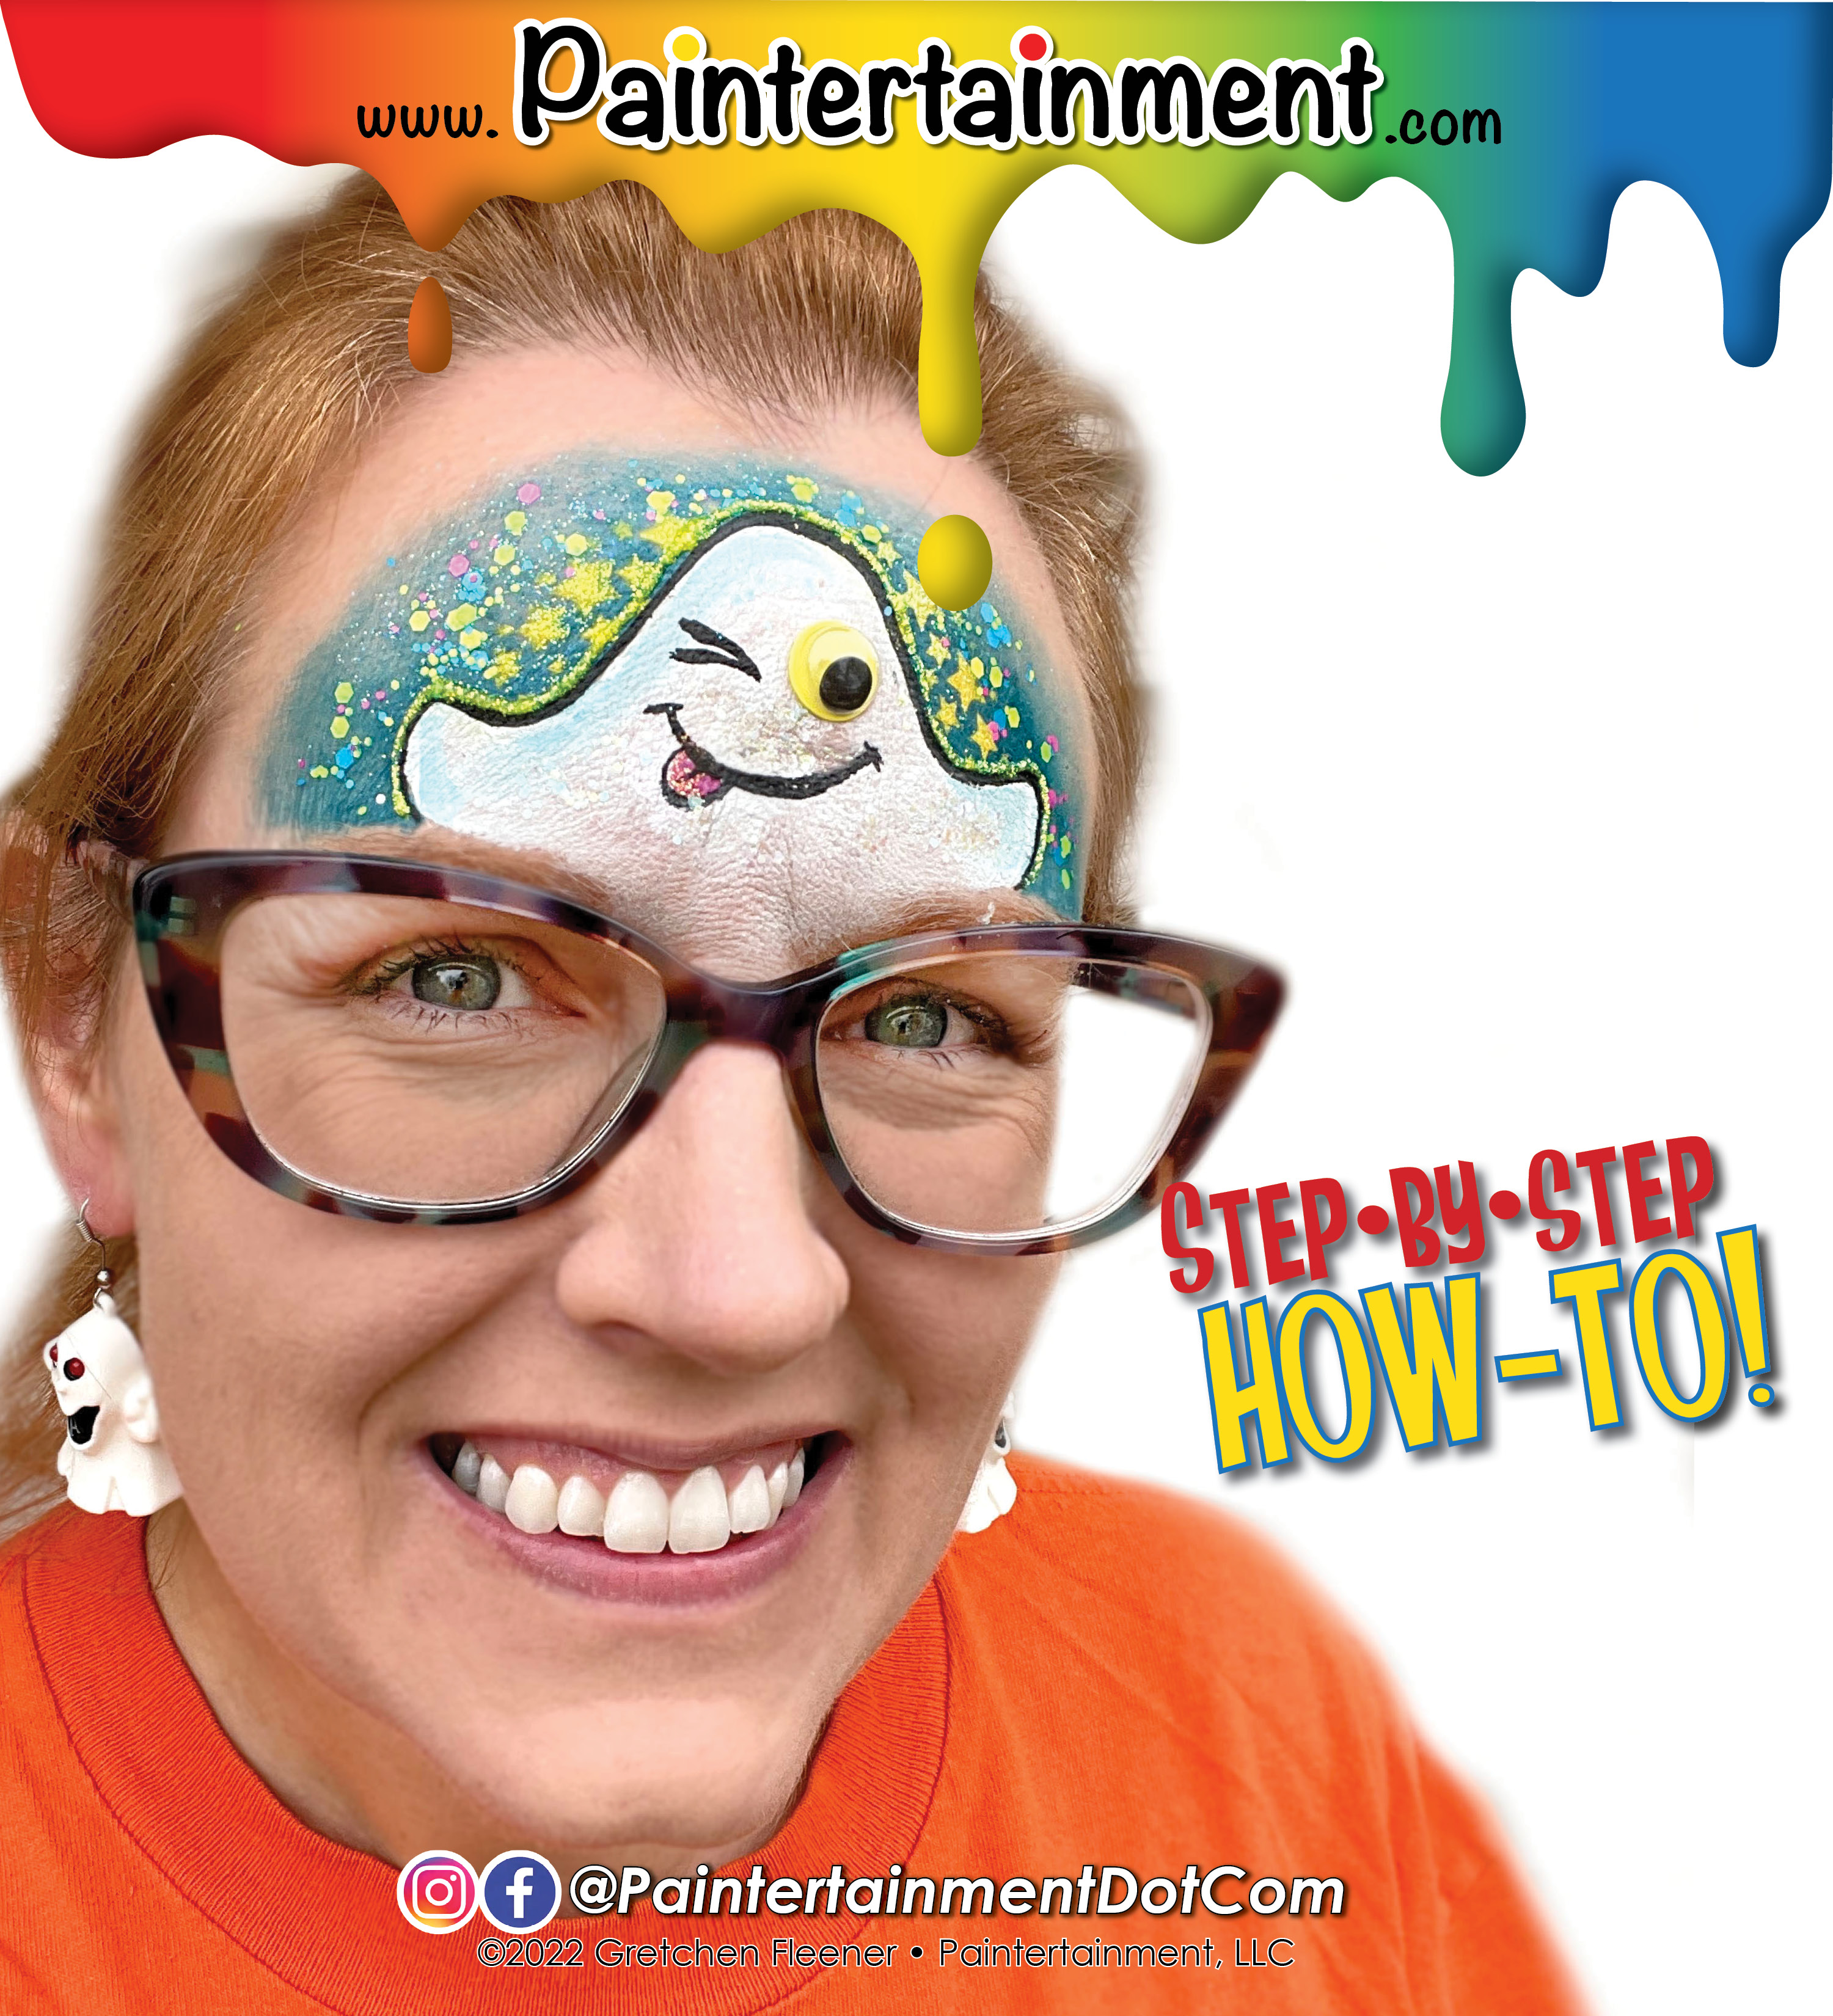
Let’s have some more fun with googly eyes!!

Want to offer some googly eyes to your designs but don’t have a lot of them on hand? You can make them stretch twice as far by making your characters WINK! 😉
This little ghost is SUPER simple and only requires ONE googly eye!

Step 1:
Using a round brush loaded with your favorite blue (I’m using FAB Shimmery snow petrol!), outline the curves of your ghost, and then paint around that for a background.
Step 2:
Fade the edges of your blue background. I love to use my Cameleon large blending brush for this!
Step 3:
Add some stars! I’m using my Ooh! Star Flip stencil and a finger dauber loaded up with yellow. First I lay down the stencil and use a makeup remover wipe to wipe away the blue, then apply the yellow paint, and finally tap on some yellow glitter before removing the stencil. This gives me crisp, clear, bright yellow stars that are glittery only ON the stars!
Step 4:
Fill in the ghost with white. I’m using Wolfe white and a round brush. Add a little dimension with some light blue if you wish!
Step 5:
Clean away a spot where your google eye will go. I use mini daubers to do this but a wipe works too, or a clean brush. Using a small round brush loaded with black (I’m using Wolfe black), outline the design and add the mouth and winking eye. Add a little tongue if you like!
Step 6:
Adhere one googly eye with Pros-Aide II (it is easier to remove than the original Pros-Aide, which I reserve for glitter tattoos), and finish it off with some chunky glitter! I used Vivid Candy Cosmos up in the sky, and Amerikan Body Art Biosphere on the ghost.


I’ve been on a google eye kick lately! Here’s a fun bat design that uses “human-style” google eyes! These eyes have fun colored irises, as opposed to your typical google eyes with just a black “pupil.”

Step 1:
Load a 3/4″ angled or flat brush with a pink & purple split cake. I pulled the neon pink & purple from my Superior Sunset base blender. With purple on top, paint the outlines of the wings.
Step 2:
Use a fluffy brush to blend the pink down over the eyes, and feather the purple. I love using my Cameleon large blending brush for this!
Step 3:
Paint some pink for the insides of the ears. I left a couple little tears in the edges of his ears!
Step 4:
Add a little texture to the inside of the wings. I used my mini stencil kabuki brush and purple with a HAS 5701 stencil (from the “Alive” set) to create a little texture, and wrapped it around and under my eyes a bit.
Step 5:
Using your favorite round brush and black, paint the bat’s head, tuft of hair, and wings.
Step 6:
Using a small round black loaded with white, add a smile, fangs and highlights. I also used a halftone stencil to fade the head onto the bridge of my nose. Finish it off with google eyes applied with Pros-Aide II, and some fun chunky glitter! I used “Valley Girl” Pixie Paint!


It’s OCTOBER! We face painters LOVE October for obvious reasons! I’ve been getting my usual flood of requests for painters at events this month and am doing my best to fill them, but if you happen to be looking for a face painter for YOUR event, make sure to plan ahead! We start booking Halloween events up to a YEAR in advance! So, if you think you may be having a Halloween party even next year, make a note in your calendar at least as early as June if you’d like to book the BEST before their schedules book up!
Now that my public service announcement is aside, I thought I’d share this fun and simple pumpkin design with you! I LOVE to play with google eyes, and they look especially fun when you mismatch the colors and/or sizes.
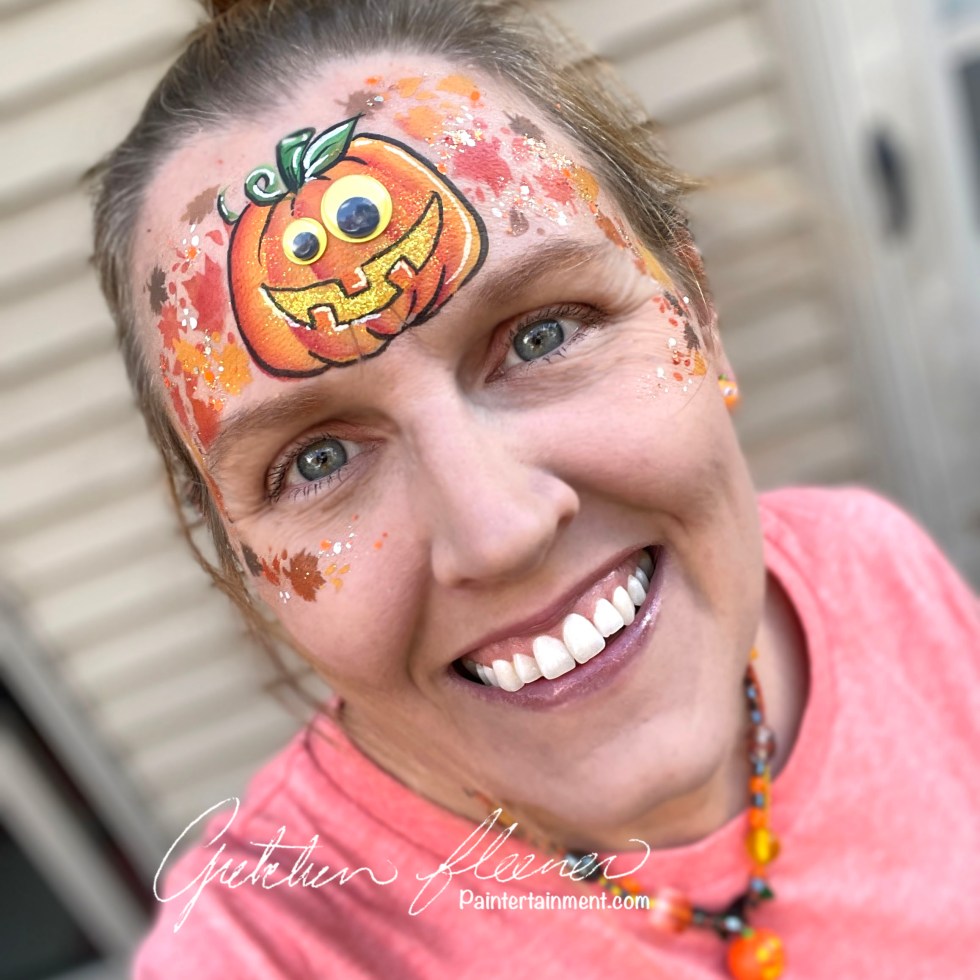

Step 1:
Load up a 1/2″ flat brush with a red/orange/yellow split cake. I used my TAG Dragon cake, and only loaded the yellow-to-red section. Paint the curved outer edges of your pumpkin, then repeat the strokes working your way towards the center. Make sure that you are consistent with which side is your shaded side (darker red) and lighter side (yellow) to get the best dimensional effect! I am assuming my light is coming from the upper right side here.
Step 2:
Use the lighter yellow corner of your brush to fill in the center area of the pumpkin.
Step 3:
Using a mini kabuki brush and an Ooh! fall leaf wrap stencil, surround your pumpkin with a variety of fall leaves! A mix of yellows, oranges, red and brown add some fun variety.
Step 4:
Load a small round brush with yellow and add a smiley mouth. I like to dab on a little yellow glitter here. Don’t worry about outlining teeth, you’ll whip those out in seconds in the next step!
Step 5:
For the teeth, just load a small 1/4″ flat brush with orange, and paint on three short strokes over the top of your mouth!
Step 6:
Outline the pumpkin with black and add a few highlights. I love Wolfe black and white for all of my outlines and highlights! Use a face wipe, Q-tip or clean dauber to remove paint on a couple spots where the eyes will stick. Apply some Pros-Aide II to these spots, and the back of your google eyes, let dry clear and stick. I use Pros-Aide II for gem clusters (original formula for glitter tattoos) because it is designed to break down easier for removal! Top. it all off with some sparkly Vivid Gleam glitter cream…I used “Trick-or-Treat!”Harvest!”


Halloween is fast approaching, so I thought I’d put together another holiday themed design roundup! Here are some of the Halloween designs I’ve done in the past.
Are you a parent looking for cheap but safe makeup to paint your own kids? Check out this blog post!
Happy painting and happy Halloween!


This week I finally got around to removing my previous coloring book window…which was SUPER FUN, and still looked as great as it did the day I put it up, but it said “Hello Summer” and we are now most definitely into fall here in Minnesota! So, this time I decided to spruce up our windows with some fun Halloween designs to welcome the kids that we hope will still be able to trick-or-treat this year! Here’s a quick little time lapse of the painting process…
This is a GREAT time to get your windows painted, whether you want something fun on your house to make your trick-or-treaters smile, or you’re a business hoping to lure in some more traffic as the temperatures drop! Plus, we window painters love utilizing nice weather days to paint…before the snow flies, wink wink!
I’ve had a couple requests in the past to paint groups of women before heading out for a masquerade themed bachelorette party. Unfortunately none of them have panned out so I haven’t had the opportunity yet! But, today I was inspired while browsing through a Google image search of Venetian masquerade masks and had to give it a try on myself…

This was really my first attempt at a mask, and boy am I ever blind when painting myself without my glasses on! (And afterwards looking at photos, I’m always kicking myself for not putting on any makeup, pretty earrings, or something nicer looking than a sweatshirt, but oh well! It’s just practice!) I always have to literally paint in super slow motion when painting myself like this, so this one took about a half hour. But, it turned out pretty cool in the end. I had a lot of fun with my interferenz gold paint, metallic silver, and adding sparkly details with my Liquid Bling and also adhering some acrylic rhinestones with eyelash adhesive!

Once I get some more time to edit my other photos, maybe I’ll share the step by step process of this one too, if not here than on my free e-newsletter!

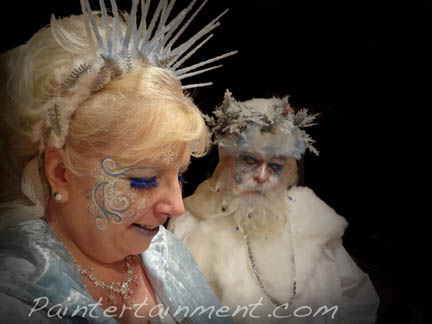
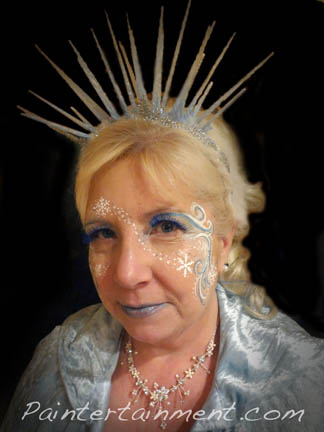
I had the pleasure of painting “Father Frost” and “Mother Frost” on their way to a Halloween costume party last night!

 |
| Working on Mother Frost |

For “Mother Frost” I used a mix of the regular Aquacolor paints (white & blues), and interferenz paints. I used a little snowflake stencil which was pretty slick, and had fun adding details with a bottle of Mehron white Detailz paint and some Amerikan Body Art Liquid Bling in silver. She brought her own sparkly blue eyelashes which were very cool, and also put on some pretty blue & aqua eyeshadow and lips!


For “Father Frost” I first covered his face and head in a base coat of Interferenz Silver mixed with a little bit of Aquacolor white, which gave him that frosty, pale look with some shimmer. Then I used more interferenz blues around his eyes to add some drama with the frosty cracks and icicles around his eyes. Aquacolor white made a nice snowflake on his cheek, but I added some blue around it to make it really pop! The blue sparkly dots done with Amerikan Body Art Liquid Bling really added a lot when the light hit it as well! I also brushed a little interferenz blue in his beard too which worked well. I’m kicking myself because I forgot to spritz his beard with a little Glitter Spray! But, it all came out looking pretty cool! (pardon the pun!)


You must be logged in to post a comment.