NOTICE: Our office will be CLOSED June 22-24. Any orders placed during this time will begin processing on June 25. Thank you for your support and patience with this one-woman business! :-)
Dismiss
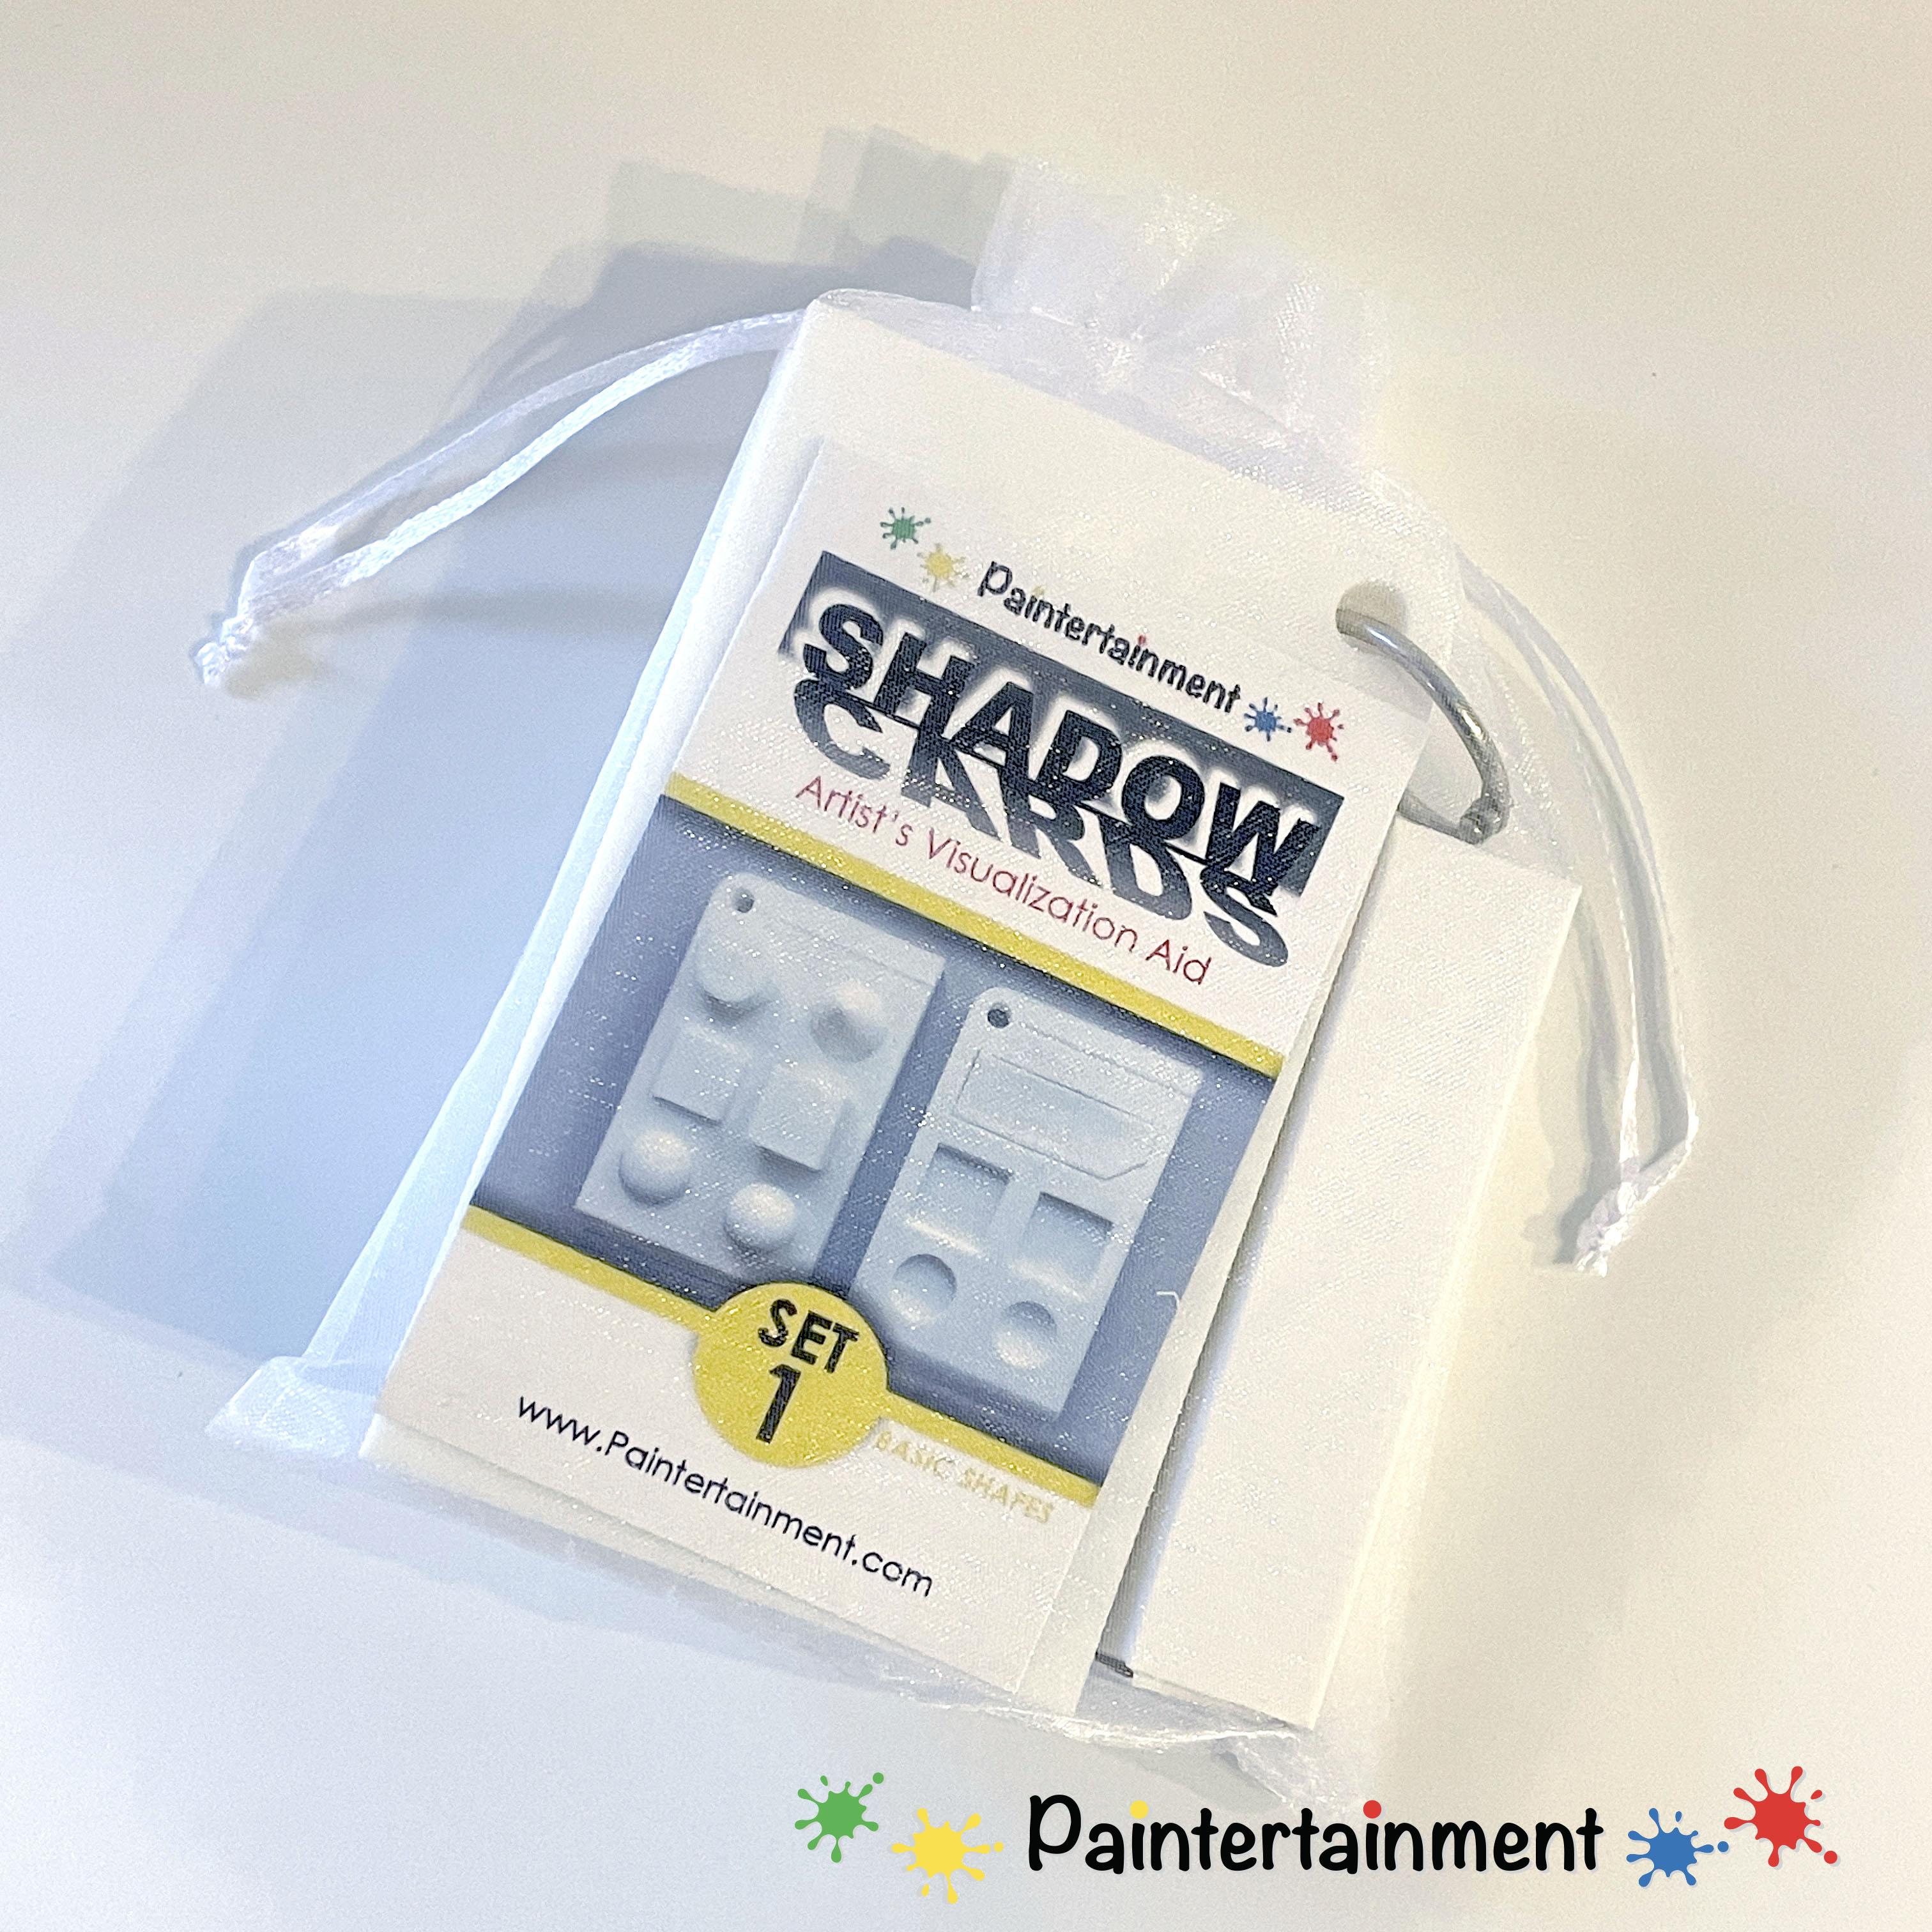
I’m VERY excited to announce a new product that has been a long time coming.
I originally created this tool as a visualization aide for my realism book and all of the conventions and workshops I taught that soon followed it’s publishing. I’ve always told my students that the best way to understand the visual behavior of the 3D objects they are trying to paint is to look at actual 3D objects for reference. So, I created a board with various shapes and surfaces on it, painted it white, and pointed a flashlight at it to illustrate how shadows move and change with the direction and intensity of the light source.
SO many of my class attendees wanted to purchase my homemade tool. But I only made one, and it was on a large scale for a classroom setting. Fast forward many years, I was able to finally combine my 3D CAD modeling experience with my new 3D printer to create a more portable version for artists to carry in their kit.
Introducing the first set in an upcoming series of “Shadow Cards!” Each card measures approximately 3″x5″, includes a high quality metal flashlight (AAA battery NOT included), and a metal ring to keep everything conveniently hooked together in or on your kit, all packaged together in a drawstring bag.
This tool helps the artist to more easily visualize highlights and shadows, and how they move and change based on the angle of your light source. Simply point your flashlight in the direction you want your light source to be coming from, and instantly know where and how to place your shadows on different shapes and surfaces.
Happy Tuesday! It’s time for another tip! This week I share the little kit I’ve put together to help make the line manager’s job easy, which in turn, can be really helpful in getting someone to agree to help you out with your line in the first place! 😉
Woohoo!! Only 13 more days until I hit the road and head to the MAX convention in St Louis! I’m super excited to be road trippin’ with an entourage of Minnesota painty friends, and to be teaching three convention classes AND one post-convention class! I’ll also be running a table in the vendor room. If you’re coming to MAX, be sure to swing by and say hi! I’ve only ever attended ONE convention within the US and that was right in my home state of MN, so I’m super excited to meet so many artists I’ve only known via Facebook! Be sure to follow me on Facebook and Instagram (@paintertainmentdotcom) as I’ll be posting pics of our adventures in St Louis!
Here are some descriptions of my convention classes:
I’ve had SO many people tell me they struggle with knowing where to put shadows and highlights. I’ll be using lots of visuals and hands on learning to help you grasp the concepts of painting something to look 3D! If you’re planning to attend my Realism class OR are just thinking about it, please connect with me via my Facebook event page by marking yourself “going” or “interested!” I’ll use this event page to communicate with my students and share info before and after class.
Wednesday, April 19, 2:4504:15: Jewelry
In my Jewelry class we will go over the top 7 mistakes people make when attempting to paint realistic jewelry! If you’re planning to attend my jewelry class OR are just thinking about it, please connect with me via my Facebook event page by marking yourself “going” or “interested!” I’ll use this event page to communicate with my students and share info before and after class.
Thursday, April 20, 2:00-4:00: Window Painting Post-Convention Class
This class is a post-convention class, so it is NOT included in your convention registration. The cost is $75, and space is limited, though I still have just a couple spots left as of the writing of this post, if you’d like to snag one! $75 will be a STEAL for all the information you will get in this class! You can easily make that back plus a lot more on one window job. I am not wasting your time having you practice painting on glass…you all know how to paint with a brush, and you have windows at home. In THIS class I will teach you all of the in’s and out’s of window painting, and how I turned my covid pivot turned into an incredibly lucrative addition to my services. I will walk you through the process of painting windows, but will also tell you what supplies you’ll need (and how little you can get away with when you start out), what to watch out for, tricks of the trade, how to remove window painting, and how to keep painting windows in the winter months. I will give you a step by step plan to take yourself from never having painted a window to soliciting window jobs in your area, marketing tips, and additional learning resources. I’ll even with you my own window job contract, and the rates I was paid for the windows I have done to date. If you’ve ever toyed with the idea of getting into window painting, do NOT MISS THIS OPPORTUNITY!! I will be boiling down everything I’ve learned the hard way over the past 3 years into 2 hours of gold for you!
If you are just thinking about this class or are planning to register, be sure to connect with me in my Facebook event page where I will be communicating with those who are interested! Once you register for the class, you will be invited to a private group for class attendees ONLY, where we can share our progress into the super fun world of window painting. If you would like to snag one of those last couple seats left, CLICK HERE TO REGISTER!
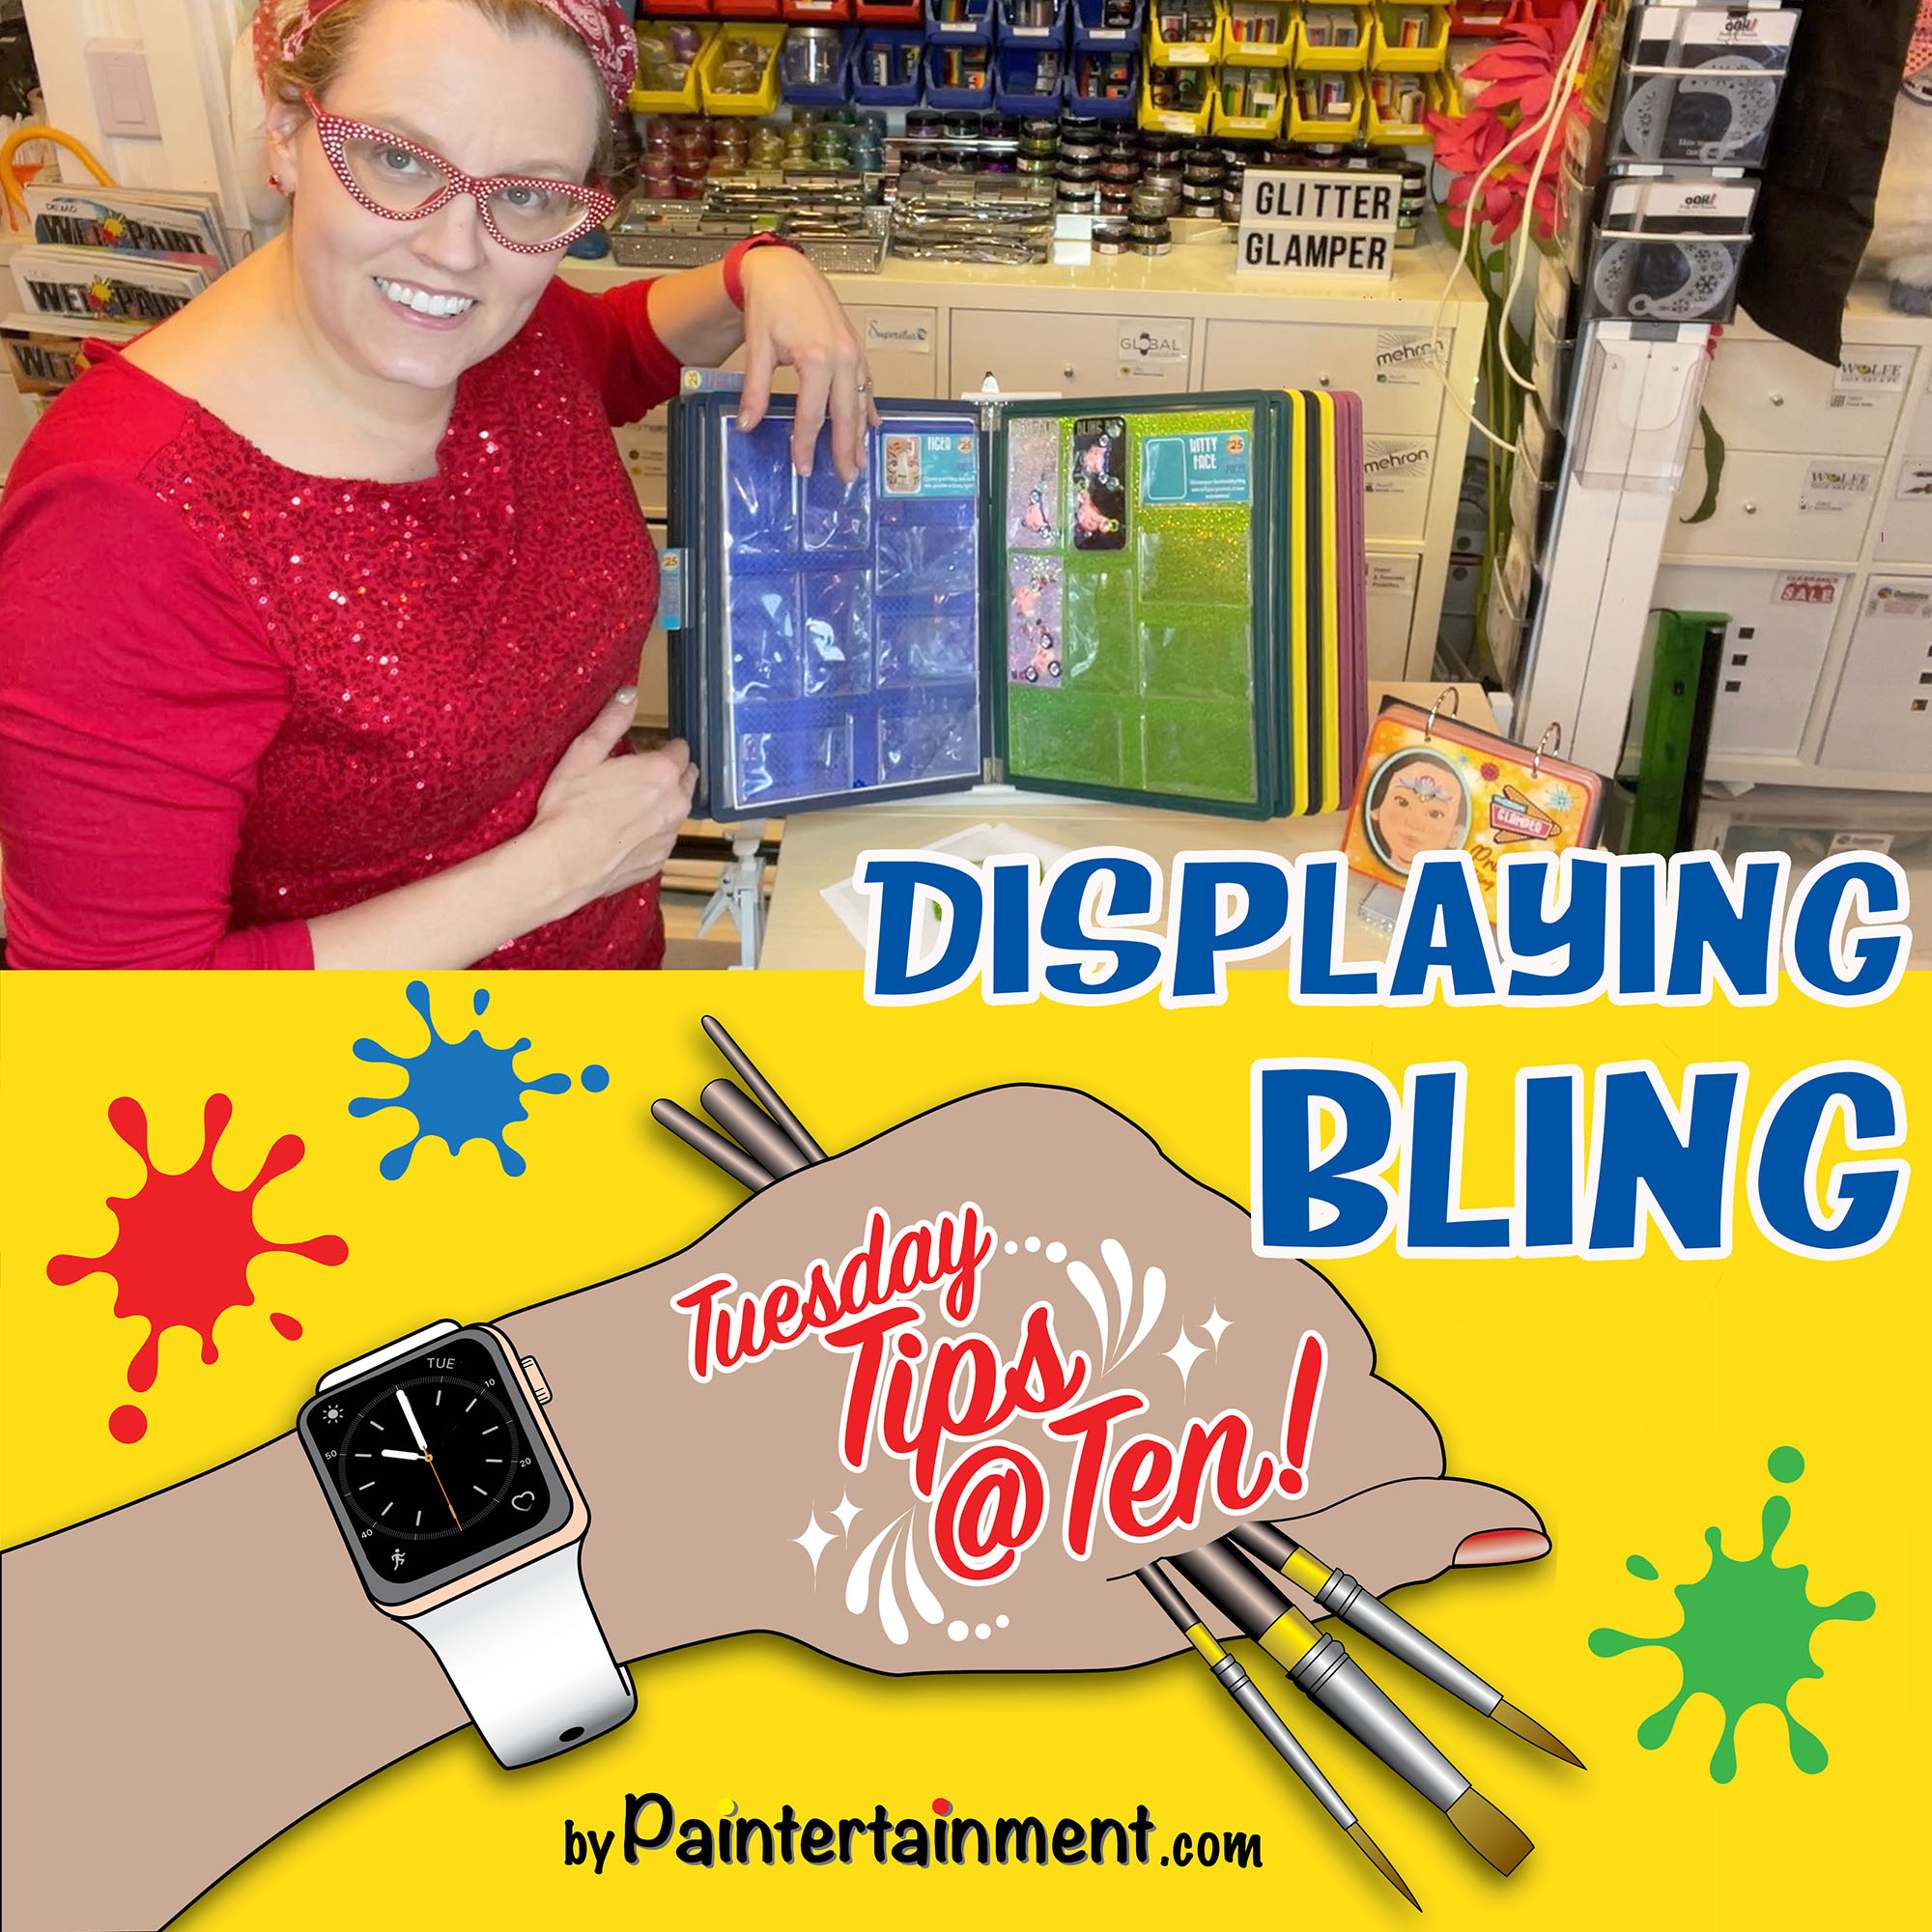
This week’s tip is on the subject of bling clusters…how to store them and how to display them! I’ll share with you my method…please feel free to comment with your own storage and display method! I’m always looking for more ideas!
Well, I just realized my post from LAST week didn’t post! Grrr…well, if you’re ever looking for my Tuesday tips here on my blog and they don’t show up, be sure to swing by our Facebook page as so far that seems to be the only place they regularly work! But for now, here’s lat week’s tip as well!
I made this mini pocket sized kit many years ago, but gave it a facelift this week! I love experimenting with the extremes of how small and portable I can get with things. I’ve had kits as huge as the rolling Fatmax and a guitar case, and have settled so far on something much more practical, but this little kit was a fun experiment!
The case itself is metal covered with duct tape…I probably found it at a thrift store but it’s been over 10 years so I can’t remember! The collapsible water cup has a strong magnet on the back so it can stick to the case itself, or can be left out, but inside has a tiny jar of glitter as well. Yes, I sawed off one of my Bolt brushes to use with the rainbow cake, haha! The round brushes are travel brushes designed for plein air artists, and the paint containers are full watercolor pans (links below) secured with small neodymeum magnets. I cut my own stencils to fit inside, made a mirror-slash-brush holder with duct tape and a plastic mirror.
This is just a fun thing to have on hand, whether you want to surprise kids in a boring waiting room or at a party, or just need a backup in your glove box! How small can YOU go with your kit?
Have you checked out our event page lately? We have a lot going on! Besides teaching at the MAX Convention in St Louis this April, I’ve just posted THREE upcoming jams for March and April! I LOVE jamming and try to host a jam every month in my home. I have hosted 51 jams since I started opening up my home to jamming in 2015! Covid was the only thing that forced me to stop for a while, with everyone working from home in our house!! Now I have one day a week when I can host jams and that’s Tuesday, so for the time being that’s when my jams will be! 😉 HOWEVER, I’ve decided that I couldn’t decide this time and in March I’ll be hosting TWO jams. One for balloons, and another 1 week later for face paint! In April I’ll be hosting a GEM jam where we’ll spend some time making bling clusters!
But there aren’t any jams in my area!
I hear from a lot of artist lamenting that there are no jams in their area. And to this I say, “then make one!” Hosting a jam is not hard. You really just need a time and a place, and a way to get the word out! If you prefer to start small, start with just having one creative friend over to work on projects with. Don’t want to host in your home? Check out your local community rooms. Most libraries have rooms you can book. Many local restaurants and even grocery stores have community rooms! Just be sure to get approval to use glitter or bring your own vacuum!
What do you DO at a jam?
You can make a jam as focused or loose as you like. I’ve been to jams where everyone works on the same things together. I like to keep mine super casual. While I may pick a general theme like face paint, balloons, gems or henna, they are always open to whatever people want to work on…I don’t ever want a twister to feel like they can’t come to a paint jam, or vice versa! Most of the fun is just in hanging out with fellow entertainers and eating pot luck, am I right?! Sometimes as artists in this field, we just need a place to go connect with like minds and practice something we don’t make time to practice when we’re at home.
I have incorporated some other fun topics into jams. One time I did a belly painting jam and invited pregnant moms to be painted which was SO fun! A couple times I’ve invited people to bring their gear and supplies they don’t want anymore and set up a “garage sale” table where we could buy stuff from each other. Another time I did a “photo jam” where I set up a photo backdrop with lighting in the garage and invited some kids over to be painted. We were able to get some nice photos for our websites, menus, etc!
What about the food?
Feeding people doesn’t have to be hard either, but it does help if you jam for a long time! (The time FLIES way too fast at my 6 hour jams!) For my jams I just have everyone bring some sort of food item to share and we do pot luck, which is always fun and easy. I used to just pick up a couple Papa Murphy’s take-n-bake pizzas for my jams, but then ours closed over Covid. Boo! But pot luck is always good. If you host your jam at a local restaurant’s party room or grocery store, people can grab their own food there too which the venue always appreciates! If you’re lucky enough to live in a place with predictable good weather, you can even do an outdoor picnic jam at a local park!
Here’s a photo from my paint jam earlier this week! I may have been painting faces for 27 years, but I LOVE that I learn something new EVERY time I hang out with my artist friends. One of my favorite sayings is, “If you’re the smartest person in the room, then you’re in the wrong room!” We ALL have so much to learn from each other, no matter how long we’ve been painting. If you live within driving distance of Minneapolis/St.Paul MN, join us sometime!! If you don’t, I hope you can either find a jam in your area or host your own!!! I decided when I started hosting these, that even if nobody showed up, I would still just utilize the time to work on whatever I needed to practice. If one person showed up, I had a friend to practice and be creative with! It’s really a win-win!
For today’s tip I’ll show you how I made a set of stanchions using things I purchased at the dollar store! They aren’t as bomb-proof as the fancy expensive ones, but they do the job and are much easier to tote around to gigs!
Learn to paint 3 different Christmas ornaments in less than 2 minutes! Earlier this week I stumbled upon a fun way to paint an ornament using a split cake, and then decided to put it together into a tutorial with two more fun ornament designs! Ornaments can look really detailed but still be super quick if you use the right tools. Check out this time lapse for some fun, easy ideas, and scroll down for a list of tools used!
Here are some of the supplies I used:
Ornament #1:
– “Holly” Arty Cake – TAG “Magpie” split cake – BOLT Firm 1″ stroke brush – Small round brush (#1 or #2) – black, white, silver paint
Ornament #2: – Large round dauber – Small filbert brush – Red, dark red, black, white & silver paint – Small round brush (#1 or #2)
Ornament #3: – 1/2″ flat brush – Small round brush (#1 or #2) – TAG “Magpie” split cake – red, green, white, silver & black paint
It’s been one busy month here at Paintertainment with window painting! Besides the three Dunkin’ Donuts locations I have the pleasure of painting seasonally throughout the year, I also did an interior job, painting some conference rooms in an office building! So much fun…here are some photos and movies of what I’ve been up to so far this winter!
Dunkin’ Donuts…all set for winter!
This was the Chaska, MN Dunkin’ Donuts’ location…I did the top painting in the fall, and had designed it so that I could easily remove just the fall foliage, to update it for winter. Thankfully the lettering all looked just as pristine as the day I put it up, so it is able to hang on through another season!
Here is a time lapse video of the Chaska Dunkin’ location…this one is on two sides of the building…
Below is the Rogers, MN Dunkin’ location! This design was SO much fun! I love this client…she really lets me just have creative freedom and always chooses something super fun from my sketches. I love incorporating donuts into their designs! The previous fall design had a fun owl design on the lower panes, so we kept the text again here and I updated it for winter with some ice fishermen! This design definitely screams “Minnesota” as we love to ice fish here, and I was sure to paint a few of my favorite fish to catch here: sunfish, walleye and bass!
This window was the hardest physically for me to paint. It was supposed to be 50 degrees this day, however, it only ended up getting to 37 while I was painting. This is all fine of course if it’s sunny and not windy…I painted Chaska in 37 and sun and didn’t even need a coat. But, for whatever reason, this day I was absolutely freezing to the point of shaking! I think it was a combination of the cloudiness, the dampness (it had just rained the day before), and the breeze. So, the paint dried very slowly…but in the end I love how it turned out!!
Here is a video…
The third Dunkin’ location didn’t need much updating…I just removed some pumpkins and replaced them with snow!
With some careful planning, you can save a little time and money with seasonal updates! Of course, window paintings aren’t really meant to last more than a few weeks, but these ones stay relatively protected from weather, and still looked like new. So, why not make them last? I did turn her earmuffs from orange to red here as well. The other side of the building didn’t have anything super fall-ish so I left that one as-is.
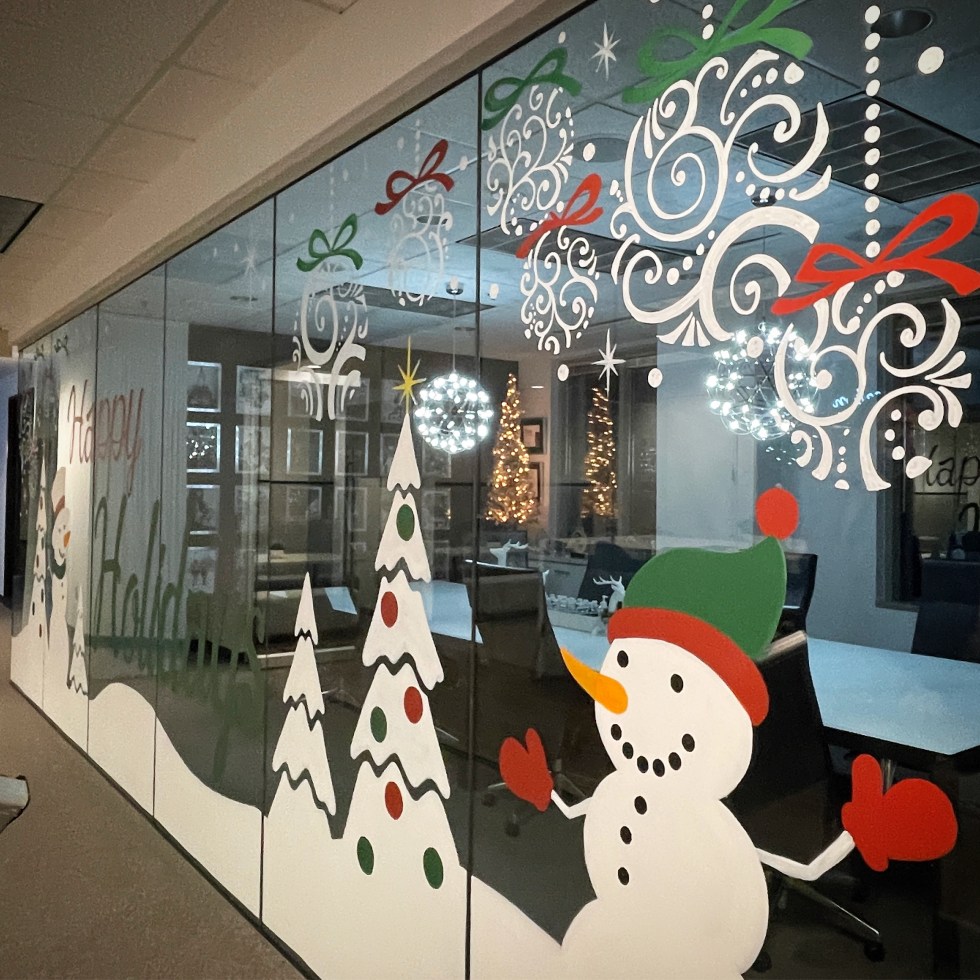
The last window job I’d like to share with you was my first INTERIOR job! This was for three conference rooms, which have basically a wall of glass.
This was a really fun and HUGE job! I probably painted around 50 feet lengthwise, and floor to ceiling. It was nerve wracking painting on carpet, but I made sure to have plenty of drop cloths and am super careful about making sure any paint I’m not using at the moment is closed up and in a safe spot. The tricky part here was keeping everything within just a few feet of the windows, so that people could still walk by me in the hallways!! It involved a lot of shuffling of my supplies. Also, being on the 7th floor, I probably spent 1/2 hour or so just bringing stuff in and out. I did also have to run out to Home Depot to grab a better, darker green…so all in all I spent about 10 hours straight here! Everything took more coats than usual…just because I am picky and I like it to be as opaque as possible. But, since these windows have exterior windows behind them, there is no way to completely avoid seeing brush strokes with the sun shining through them. I love how it turned out in the end, and it was really nice to be inside and not worry about weather! I also got to try out my new Posca paint pens for the ornaments. I didn’t take any time lapse movies of this, being that it was in an office, for privacy reasons.
So, as you can see I’ve been busy lately squeaking in window jobs between entertainment jobs! But, I really love window painting and I’m so glad that Covid pushed me to add this to my repertoire. It blends perfectly with my schedule, as I can paint windows on week days during the day, leaving those busy holiday weekends for face painting and balloon twisting!
Interested in learning more about becoming a window painter? Check out the latest issue of Wet Paint Magazine! I recently wrote an article about how I got into window painting, and the process I followed getting started, including some tips & tricks of the trade, resources to learn more, and a list of what supplies you need to get going!


You must be logged in to post a comment.