Posted on Leave a comment

Crowd Control Tips

If you’ve been face painting for even a short amount of time, chances are you’ve been swallowed up by the crowd at at least one event.  You’ve literally felt the breath of onlookers on your neck, had your table bumped countless times, and have been asked “where’s the line?” by endless parents.

If you’re smart, you’ve used this as a learning opportunity to improve things for next time.  Maybe you’ve vowed not to do large gigs without bringing along additional painters.  Maybe you’ve decided that big crowds just aren’t your thing, and you don’t even bid on these types of gigs.  Or perhaps you’re still contemplating how to control the crowds and make it a better experience next time.  If so, this blog is for you…today I’m going to share some of the new tools that I have in my arsenal for controlling crowds!

Crowd control is all about providing order, and in turn, comfort for you and less confusion for the party guests.  Standing in a “blob” of people and trying to keep track of who’s next is just as frustrating for parents as being engulfed by said blob is for you.  Parents are having a hard enough time keeping track of their rambunctious kiddos, so if you can put out some visual cues that are as obvious to the kids as they are to the parents, it’s a win for everyone!

Here are some ways to mold that blob into a line, and even give yourself a little breathing room!

Define where the line should START:

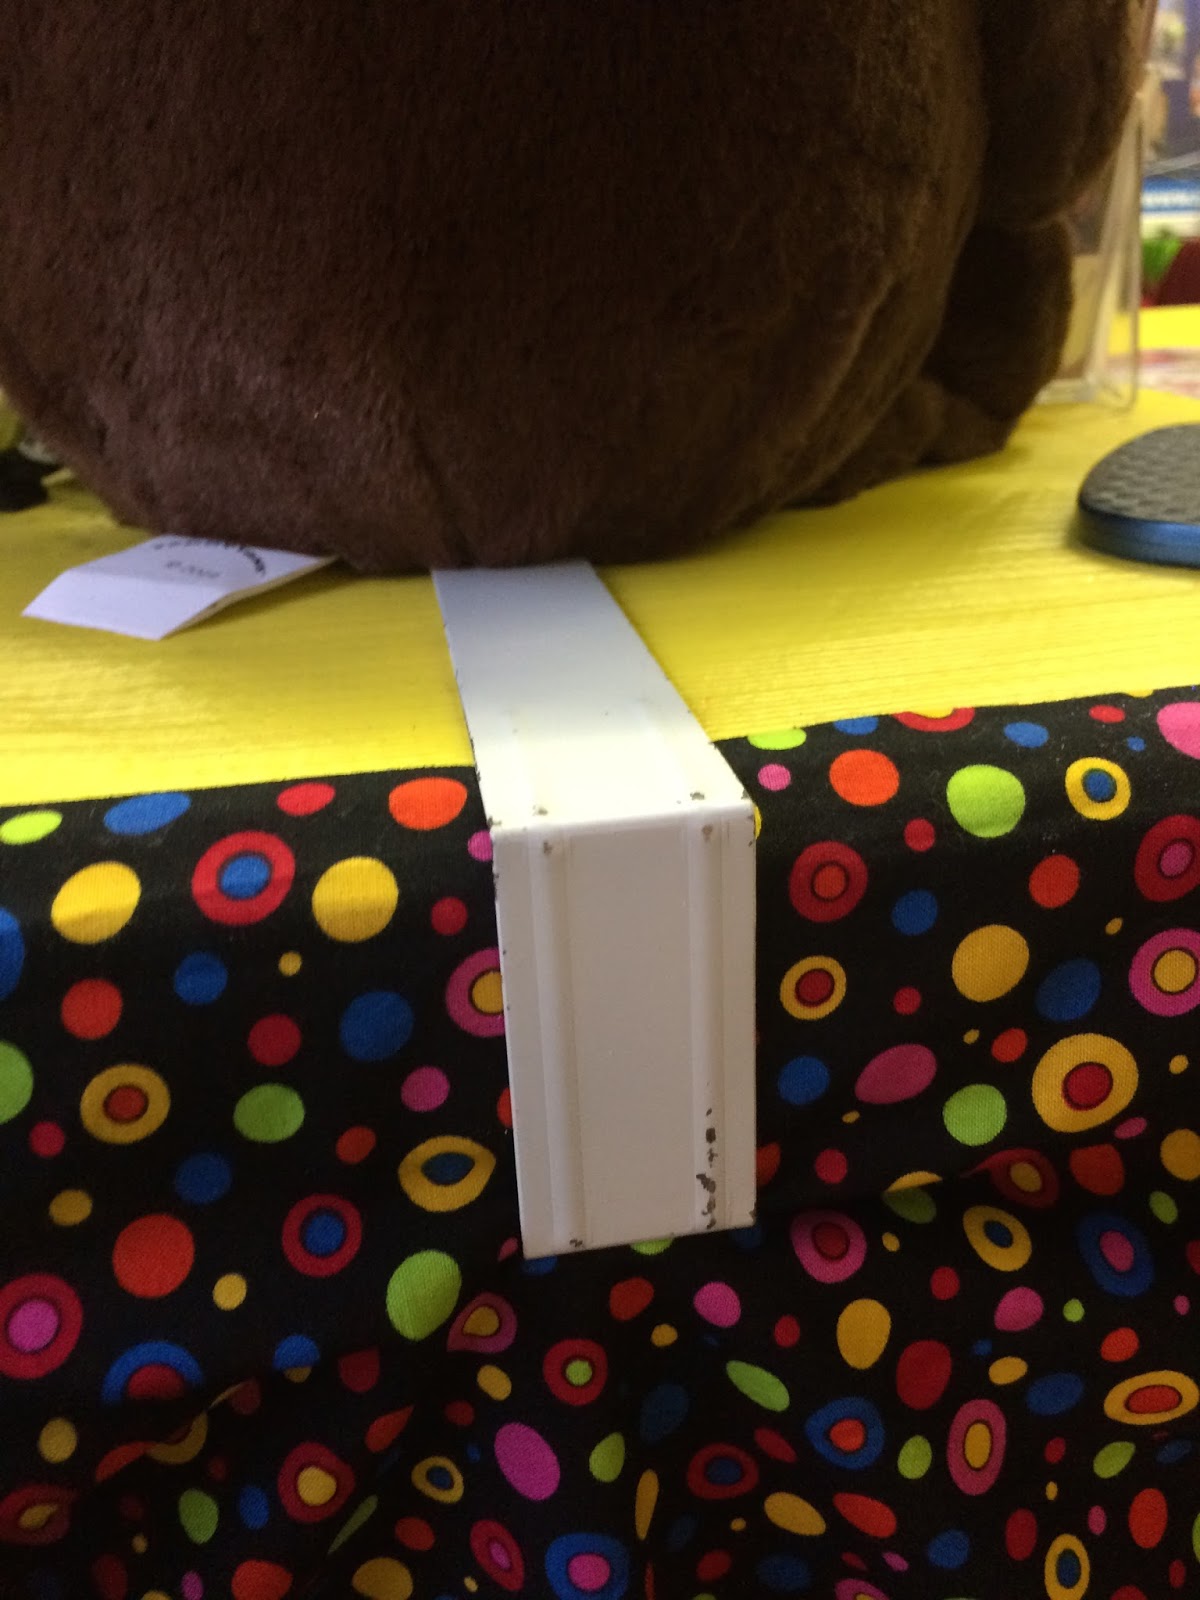
“Where is the line?”  I’ve been asked this question too many times at this event, so I bought this great arrow sign online to use this year.  Yes, it was $63 bucks.  Yes, it looked ENORMOUS in my kitchen.  But when I put it outside it was really about the right size, it worked as a connection point for my chain, and finally…finally…not ONCE did anyone ask “where is the line?”  Worth every penny in my opinion!

This sign is a magnetic white board, so you can write whatever you want on it. I made a laminated sign with magnets on the back so I could pull it down and put up a “closed” sign at the end. The arrow is adjustable so you can angle it as you please.  The post breaks down into two pieces, and the base can be weighted down with sand or water. I had to go add some water to it as it initially fell over a couple times.  But with a little water, it held up great the rest of the night.

Define where the line should STOP:

If you don’t tell the line where to stop, it will stop practically in your lap.  I came across this fantastic idea in a Facebook group.  I actually designed my own mat on the computer (I have a design background). I gave it a couple coats of fabric waterproofing spray, and now I can simply hose it off to get it clean! You can purchase this mat HERE!

There are other methods you can use to mark a spot for kids to wait too:
– Put down a piece of duct tape on the ground.
– Keep a piece of sidewalk chalk in your kit to mark the ground when working on pavement.

However you mark your spot, it really helps to be able to tell the kids, “please wait behind the line!” or “Put your feet on the clown’s feet if you want to be next!” 

Define YOUR Space:
Defining your own space is just as important as defining the line.  Make it clear where kids aren’t supposed to go, but make sure you leave plenty of room for them to get around where they ARE supposed to be.
I bought 32 feet of plastic chain on Amazon.  I also have a big string of triangle pennants that works as well.  In the photos below I attached the chain to my signage because we were on concrete. However, if I am in the grass, I have some pig tail posts and they are great for roping off an area!
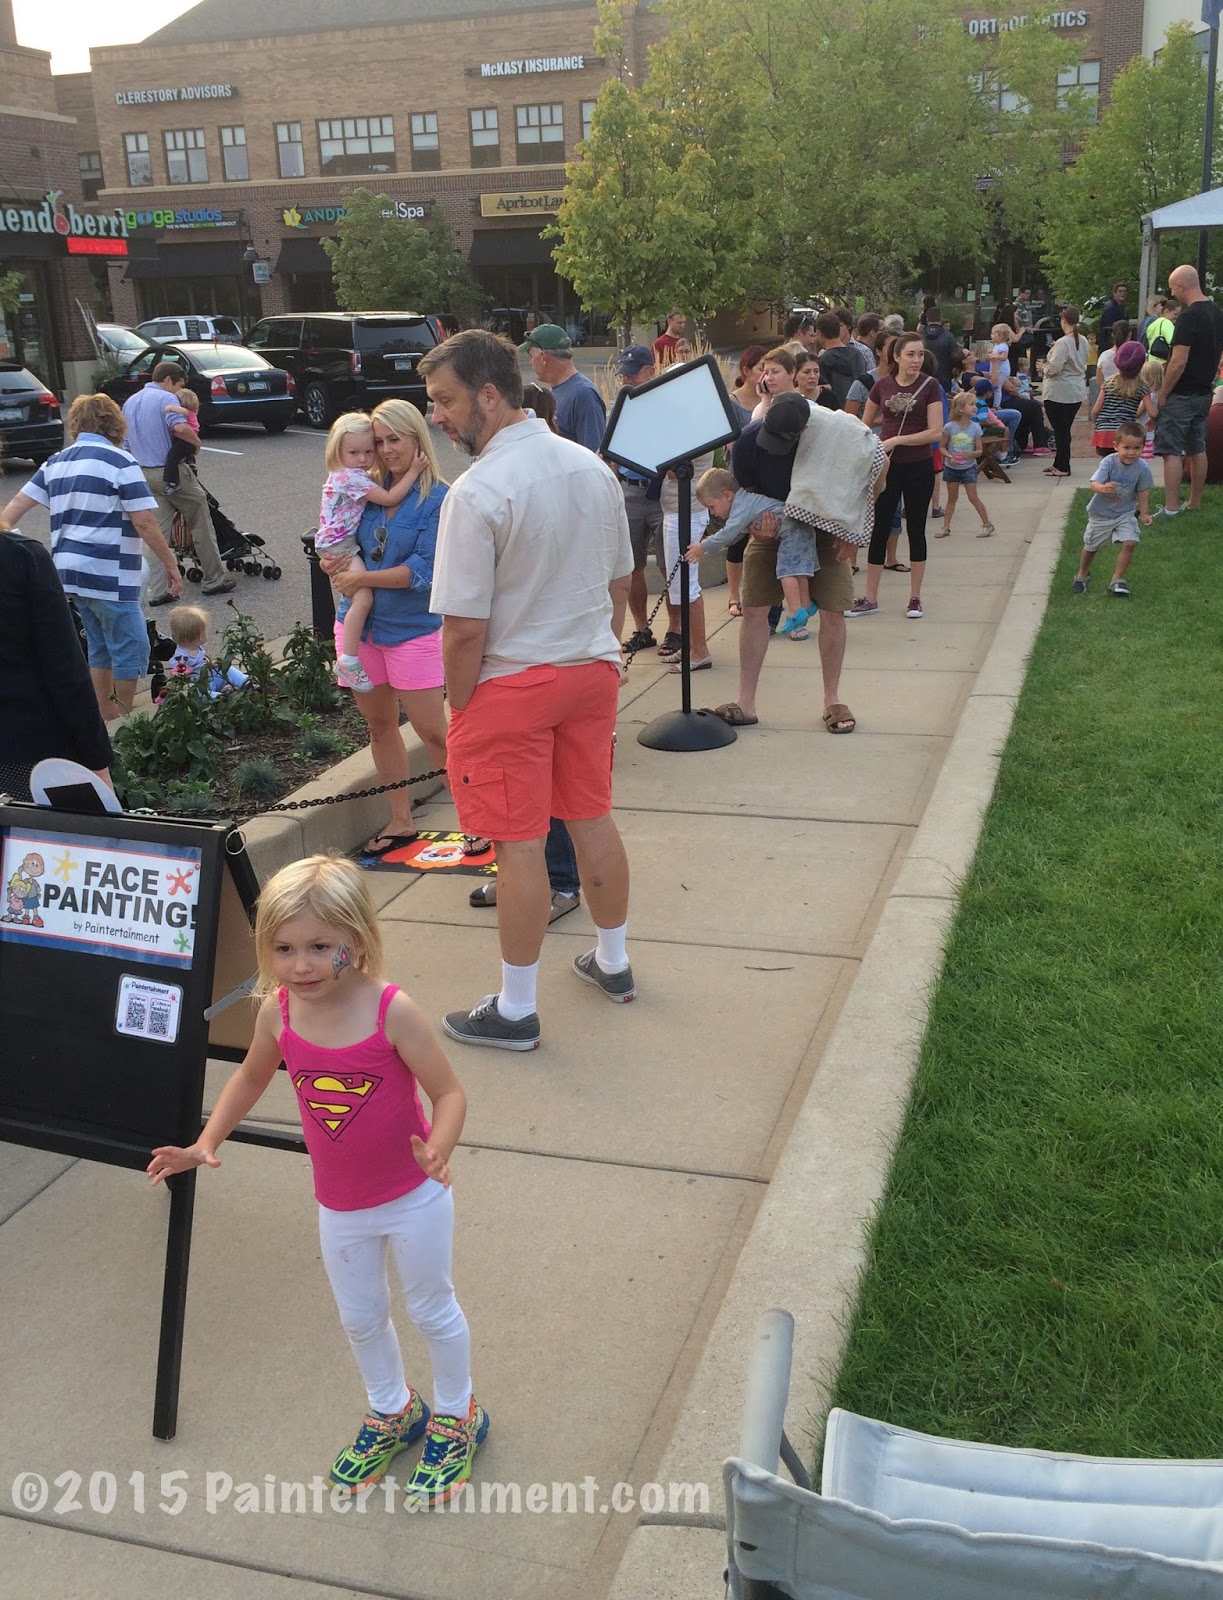
You’d never know from this picture that there is a line at least 20 kids deep just off screen!
The lineup you couldn’t see in the last pic!
Defining your space is really important for reducing your own stress level, not to mention messy spills, damage to your kit or messy fingertips of passers-by. I personally am used to being climbed on, bumped, breathed and coughed on, but keeping my space clear is good for many other reasons too.  It makes each child feel extra special that they are the only ones allowed in that space for their own special time to be painted.  It gives the parent a chance to exhale and know that they can see their child among the crowd, set their purse down, park their stroller and enjoy the experience too.
After we started painting I actually moved the chain from the left to the right corner of the design menu, so the board was out of our walk way.

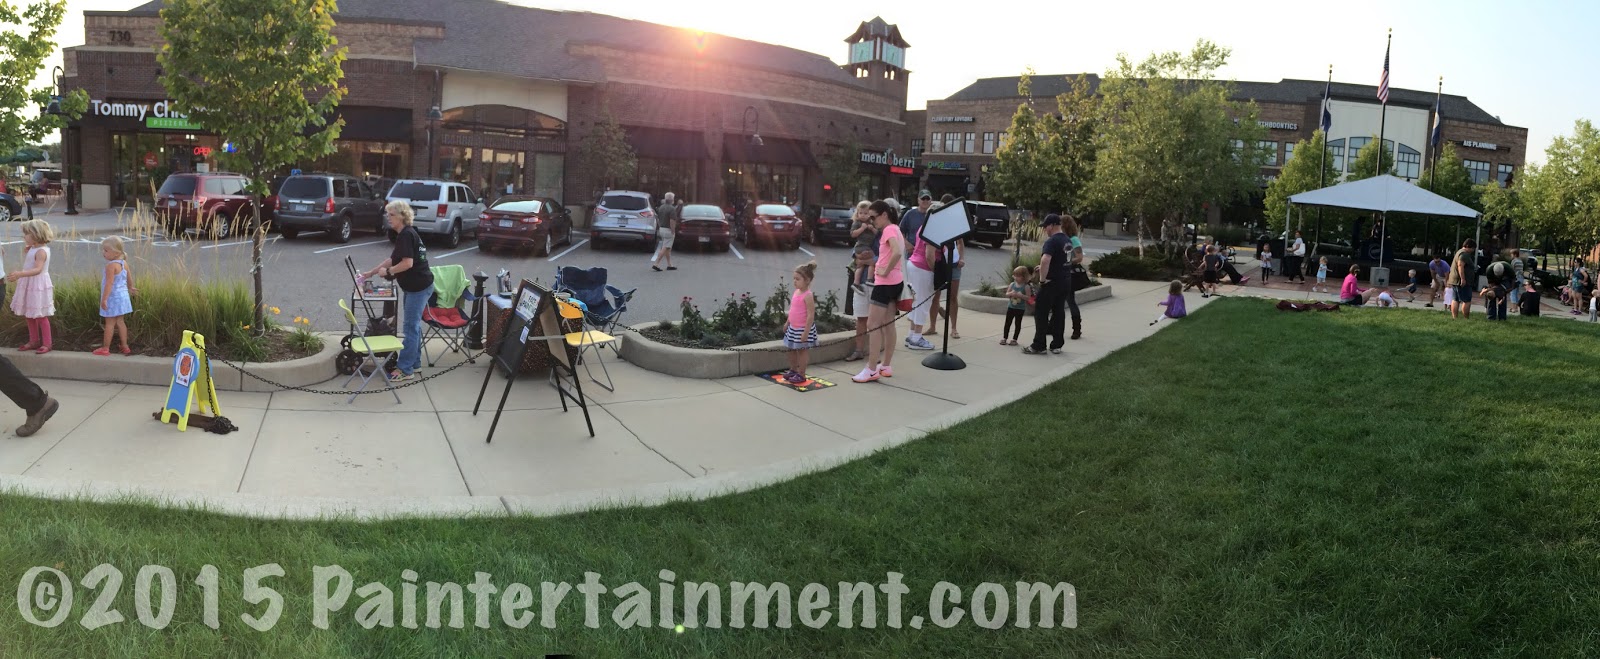
This was an event I painted at just this week.  It’s one of my busiest annual events, and we painted probably close to 150 kids or so in just 2 hours, but we never felt crowded.  Behind us are pillars (blocked by our chairs), and together with the street and curb, people don’t congregate behind us.  The chain not only defines the line, but also blocks off space for the kids and parents to get in the chair, get out, and leave to the left.  It also prevents people from forming two lines for two painters.  There is one spot to wait, on the mat, and whoever is available next paints that child.

Panoramic view of us along the sidewalk.

Define where to go when kids are DONE.

Once the kids are done being painted, they need a clear exit…preferably in the opposite direction of the original line to prevent more traffic congestion.

“Exit Only” tells people that the line does not form here. On the other side I had a “1 design per child” sign, so they knew when they left the chair that it would not be worth their time to get back in the line.

I found this little plastic tent sign at a thrift store, which once said “slow; children at play.”  I spray painted the blue part, glued on a circle of magnetic-receptive vinyl, and then made interchangeable magnetic signs that I can put in that circle.  So, this little sign performs several functions at any one event.

My sign with interchangeable graphics

The arrow can be turned in any direction as it attaches with velcro! The larger circle attaches to the sign with magnets.

Define the end of your shift.

Ending the line is one of the toughest parts of our job as face painter.  If we painted every parent who asked for “just one more,” we’d never get home to our own families.  We are not painting machines…we need to end at some point, and go put our own little honeys to bed.  I did a whole e-newsletter on tips for cutting off the line.  With this week’s event it’s easy because we lose all our sunlight by the end, and everyone naturally goes home!  But, it is still important to give some signal that the line is ending, or at least let those still in line know that continuing to wait is futile.

Magnetic signs to the rescue…I simply moved my little yellow sign to where the line forms, with a “sorry, we’re closed” sign, and swap out the “line forms here” sign with another closed sign.

I also have a “Open until” sign that attaches with magnets, where I can write in my end time.  This lets everyone know when we are closed for business.

My design menu is all attached with magnets as well.  So, if needed I can remove my design menu in mere seconds, and slap up a “closed” sign in it’s place.  It helps close the line when kids can’t see all the design options!

There are many ways to end the line. I have a sash that I can have the last kid wear that says “sorry, I’m the last person to be painted today!” I also have Tyvek wristbands I can give to the last however many kids in line.  Some people hand out tickets, poker chips, or stickers to the last kids in line.  If you don’t have a ticket, you don’t get painted.  

When you are approaching the end of your shift, hand out as many tickets as you think you can paint in the time remaining, then put out your “closed” sign behind the line.

I did this recently at an event for another artist friend of mine. She had a pouch of “tickets” (little foam shapes) and I just handed out as many as I thought I could paint in the last half hour.  When the last kid with a ticket was painted, we were done.  I made these little laminated tickets above for the same purpose, although the sun setting ended this gig for us so we didn’t need them this time.
I hope this helps you with your future HUGE events! It sure made an enormous difference for us this year at this particular event, and I now feel totally prepared for crowded events.  Got your own huge event coming up and need a face painting team with crowd control solutions? Hire us here!


Posted on Leave a comment

Never Settle for Being the Best: My Journey from Cheek Art to Full Face Painting

I’ve been in the face and body painting business for 20 years now.  I still have so much to learn!  I’m determined NOT to settle on thinking that I’m the best at anything…I always have something to improve upon and learn, and hope to keep it that way as long as I’m around!

17 years into it I felt that I had pretty well mastered cheek art, so I thought I’d finally branch out into the world of full face designs. (Yeah, I know…took me long enough, right?!) The art of face painting has really grown drastically over the years and I didn’t want to be left behind!

A full face made of cheek art?! I did a little experimenting with what defines a full face vs half face vs cheek art…

I still remain a huge advocate of the benefits of offering cheek art, strive to help others learn how to do cheek art just as amazing AND fast, and even run a cheek art face painting group on Facebook.  Cheek art still remains the #1 request at my county fair.  However, I am always trying new techniques and tips, and had to give full faces a try.

In 2011 I began offering full faces in my pay-per-face county fair booth, along with my cheek art! Now that I look back on the photos I had put on my design menu, I can really say I’ve come a long way!  I have a LONG ways to go and have learned so much from my peers.  Heck, before Facebook came along I really had no idea how far face painting had come and could go!!

Here are some pics of my journey from then until now.  You can see my awkward attempts to transfer my cheek art versions into full face versions at first…

Butterflies and tigers are still my nemesis! I used to try to cover the whole face with butterflies that just looked awkward.  I have since lightened them up a bit, and I think they look better. I still am not happy with my butterflies’ bodies and antennae, but hey, we all have stuff to keep improving, right?!

I actually put that one on the left on my banner.  MY BANNER!! Ugh, bless the heart of this little girl who loved her tiger, but oh my, I’m so much better now! Tigers are SO tough for me and I’m still working on them to this day! This one on the right I just did a few weeks ago on my little boy…also still new to Starblends which I used for the base!

My first full face spidey on the left..today’s Spidey on the right with a little extra “pop” of graffiti eyes stencils!

I still have a LOT to learn and improve upon with my full faces and will probably never look at a picture of my work without critiquing myself!!  But I think the desire to keep improving is what makes artists great.

Besides improving my full faces, in my attempt to branch out beyond full faces has also taught me:

– Ways to improve my speed on ALL designs by adding more brush sizes and shapes to my tools
– the value and wow factor that stencils can bring
one stroke techniques
– double-dip techniques
– teardrops!!
– the pro’s and con’s of using Starblends
– How awesome bling, google eyes, and feathers can be 
– that I prefer large brushes & lollipop blenders to sponges

My drive to learn and improve has pushed me to learn and now offer balloon twisting and henna body art as well, and those have been some incredibly fun learning experiences!!

Are you stuck in a full face rut and frustrated with cheek art? Practice it!! Are you stuck in a cheek art rut and frustrated with full faces? Practice them!!  Maybe you’ll find they’re not you’re thing, but the journey of trying and stretching yourself will teach you so much that can only improve your work!

Stretching yourself can be tough because it means admitting that you are not the best; that you have room to grow.  My hope is that I never settle on my talents as they are…that I will continue to make myself learn and grow. Sure, along the way I may find that the latest technique is not for me, but at least I can say I’ve tried it and can speak from actual experience. That’s all people really want to hear about anyway, right?

Posted on Leave a comment

Carver County Fair 2015 Recap

Last week I tucked my 18th county fair under my belt…this being my 3rd year at Carver County Fair!  2015 was a great year and I thoroughly enjoyed painting so many adorable faces!!! If you’re coming to this post via my Pinterest pin on cheek art, scroll down for a bunch more! If you’re interested in learning to do simple, quick cheek art yourself, be sure to check out my book, “Classic Carnival Cheek Art! We also have package deals for those new to face painting that include everything you need to get started, and an awesome page of FREE learning resources!

Setting up the booth…
The fair starts on Wednesday, and this year I loaded up my booth and boys and we set up Tuesday morning.

All packed in and heading to the fair!
The boys are just excited to play games on my iPod and iPad while I set up. You can tell they never play video games in our house, only on trips and in waiting rooms, ha! But they were thoroughly entertained! I keep telling them someday they’ll be taller than me and will have big muscles to help Mommy load and unload my booth!
The booth all set up and running! This was taken on the last day when my hubby and boys came to visit me!  I always want my booth looking as sharp on the last day as it does the first.  I do a lot of cleaning every night and when I have time between paintings!
This is the view when walking into the building of where I work.

New this year…
I had a totally new setup this year with my chairs. I now do most of my parties standing up with kids in this tall director’s chair! However, my back and feet wouldn’t be able to take multiple 12 hour days standing up.  So, I decided to bring along my hydraulic stool that I use when I do belly paintings. It worked great! The kids got to sit up high and feel like royalty, and I had the option to sit or stand depending on how I felt and how tall the kids were.

Add caption

 Photo prop boards were a new and fun addition this year! My new photo props fit nicely on the little fabric shelf under the director’s chair, and I’d pull them out whenever someone had a face that fit with the board…

Say cheese!!
Me trying out the county fair board!
A popular ice princess design!! A few booths down they had cardboard cutouts of Anna, Elsa and Olaf to take photos by too which was fun for the kids!
Just chillin’ with Tippy the cow…

(If you’re interested in adding fun photo prop boards to your own gigs, I have the files for purchase to print your own set!)

  • Photo Prop Board Print File - HALLOWEEN
    Photo Prop Board Print File – HALLOWEEN
    $14.99
  • Photo Prop Board Print File - CHRISTMAS
    Photo Prop Board Print File – CHRISTMAS
    $14.99
  • Photo Prop Board Print File - PRINCESS
    Photo Prop Board Print File – PRINCESS
    $14.99
  • Photo Prop Board Print File - FANTASY
    Photo Prop Board Print File – FANTASY
    $14.99
  • Photo Prop Board Print File - ADVENTURE
    Photo Prop Board Print File – ADVENTURE
    $14.99
  • Photo Prop Board Print File - SPRING
    Photo Prop Board Print File – SPRING
    $14.99

Also new this year was this small safety information sheet I had out on the table, educating parents on what to watch out for when allowing their children to be painted.  It’s really shocking how many events offer free face painting that is not face paint at all, but tempera, acrylic, and other unsafe craft paints & glitter.   Click here for my in-depth article on why “non-toxic” paint is NOT safe for skin. I had so many parents thank me for this information!

There was another person painting at the fair this year with questionable paints in jars,  and more than once I was asked by the parent to wipe it off and paint something else before they even saw this flyer.  Unfortunately whatever it was stained badly. Safe face paints can stain too, depending on your body chemistry and the colors of the paint.  Some brands’ blues and greens stain more, etc. You can see my analysis of what professional brands stain the most/least here.  If you ever have this happen, at least if it is face paint, try applying a little lotion to the skin. Wait 20-30 minutes and then try washing again.  Usually this helps to release the paint. Do NOT ever clean face paint off with baby wipes! They have been known to cause awful reactions on kids’ faces no matter what type of paint is used.  I tell people to remove with a gentle soap and water.  The best way is to lather it up with liquid soap (BEFORE getting it wet), loosen up the paint, and then rinse with water.  This is the best way to prevent staining during removal.

Anyway, back to the fair…

Also new this year was basically my entire paint kit.  My kit changes frequently but this year it grew so much, I’ve outgrown my countertop! Time to make a few modifications for next year!

My boys sent little stuffed dogs with me each day at the fair to keep me company in my booth. 🙂

Designs…
A few of the designs I did this year… Cheek art still remains one of the most requested forms of painting for me.  And, being one of the very few artists in the Twin Cities who is faster at cheeks than full faces, I still am able to do them and offer them for less than full faces.  However, in general, most painters prefer doing full faces as cheek art requires a lot of precision in a small space with little to no room for error, which takes longer.  For now, I’ll keep offering it as people love it and I’m convinced it can be just as awesome!! It also works well at the fair when kids faces are often carrying the remnants of all that good, greasy, sticky fair food!! 😉  I paint a LOT of arms, too.  Sometimes kids ask for their hands.  Usually I then suggest just above their wrist…that way they can still wash hands after petting the animals and eating cotton candy without losing their artwork.  But, I’ve been doing a lot of full face, half face, and eye designs these past few years and they are very popular!

These two friends wanted to split a design, literally!
Gotta love it when someone dares their friends to get painted, and they actually go through with it!
My mom painted at the booth on Thursday so I could visit with my boys!
Thursday  night we had a storm roll through and were told we could close up early! These are the days I love being in a building, versus a tent outside!
My little man Sam wanted me to paint Mercy Watson the pig on his arm! 🙂

My Arm Designs…
Every year I paint elaborate things on my own arm.  I love doing this in between customers, or when there is a lull in business during the day.  However, being that this was my busiest fair in my history of doing fairs, with 4 out of 5 of the days being record breakers, I didn’t have as much time to paint myself.  Here are a few things I did though, some quick and some not so quick…

Quick roses, done with Global Hobart.  Love that cake!
This was my most detailed arm design for this year…Inside Out! Love that movie!!
Closeup of “Sadness” and “Anger”
Closeup of Disgust and Joy…
I did this little design to go along with the henna I had already done on my hand!

 Big thanks to all of you who stopped by my booth this year and made it my best year ever! See you in 2016!!

Me and Toby taking a lunch break


Posted on Leave a comment

Tip Jar Security: How I Secure my “Fish Bowl” Tip Jar

My new tip jar!

I almost never use tip jars.  Well, there was one Christmas gig where we agreed with the client to put out tip jars just because they refused to hire enough artists for the crowd and we worked our hineys off.  Other than that, I only tried using a tip jar once this past week at my county fair.  I do pay per face at the fair and never have had a jar out.  I always get good tips anyway, with no tip jar and no hints of tipping visible.  But, this year I experimented and tried it just for one day.  I had one of those cute plush “Teddy Tank” fish bowls burning a hole in my closet that I had gotten for $5 at Walgreens and had to at least try it!  I don’t know if I’ll use it again or not, as I feel I charge enough already.   But, I get SO swamped at the fair, and being located right by the building entrance, I figured it would be awfully easy for someone to grab the jar off my table and run.  I actually know one painter who was mugged after a face painting job, and have heard multiple stories of others who’s tip jars were stolen, which makes me extra leery.  So, I set out to find a way to secure my jar so that it wouldn’t be an easy target. 

I took photos along the way and thought those of you who have these same fish bowl jars (they seem super popular lately) might find it useful!  This can likely be adapted to any plastic tip jar but here’s what I did with my fish bowl! (you can skip all the rivet/eyelet stuff if you just have a plastic jar!)

Remove the plush piece from the plastic bowl. Cut a small hole in the center of the bottom of the fabric piece of your plush animal.

Slip a rivet through the hole, with the finished side on the right side (outside, furry side) of the fabric.

View of the rivet poking through the inside of the fabric.  Point to it with your henna’d finger…ha!

Use your hammer and rivet tool to secure the rivet in place.   You can buy these large eyelets/rivets at craft stores and they come with the little tool to hammer.

Finished rivet. This now enables you to run a bolt through your fabric, without causing it to run, frey, etc.

Finished rivet

Now drill a small hole in the center of the bottom of your plastic bowl.  I am using my dremmel tool here but you can use a drill bit as well.

Now you need a little hardware.  Get a washer, bolt and nut.  You also need something to secure the jar to.  I happened to find a great bent metal piece that came from a towel rack that hooks over a door.  You could find a metal bar or a piece of wood and drill a hole in it as well.

Reassemble the fish bowl by placing the plush back over the bowl, aligning the eyelet with the hole in the bowl.  Thread the screw through your securing bar/wood/whatever, then through the rivet/eyelet in your fabric and hole in your fish bowl.

Inside view of the fish bowl, with a washer and then bolt threaded on.

Now you have a bar that is securely screwed to the base of your tip jar.  Like I said, this can be a metal bar, a wood piece, or whatever you have on hand.  The point here is to have something that you can then clamp or screw right to your tabletop.            
Now I got lucky to find this piece of metal that was already bent like a hook, which fit just right over the back edge of my table!  I then took a large clamp and clamped this bar to the underside of the table, which you can’t even see here as it’s behind my tablecloth.  Even a flat piece though could be clamped down to the table with a simple C-clamp.  Or, screwed into the table if you are okay with drilling a hole in your table.
I like how this looked in the end.  It doesn’t look like my jar is bolted down…it’s just sitting there nicely, but if someone were to try to grab it and run, I would definitely notice and it would not be easy for them to remove it.

I did notice that with this particular tip jar people had no idea how to put tips in.  I just put sticker letters that say “thank you,” as opposed to what some do, “feed me.”  I’m thinking if I ever use it again, I may put a cardboard tube or something in the monkey’s mouth to spread his mouth open just a bit, so that people notice that the money goes in his mouth.  Most of the time people just handed me tips and I stuffed them through the hole in the back.  (Which also made me think I’d like to make some sort of flap to cover the hole in the back for security as well)

I hope this is helpful for some of you, or at the very least gives you some ideas to secure your own tip jar!  Thanks for stopping by, and happy painting! 🙂


Posted on Leave a comment

New product additions this week…

We have a few new additions to the shop this week!

Our rainbow of Cameleon makeup feels much more complete now, with the addition of Orange Juice, Clover Green and Purdy Purple!  We’ve gotten a nice stash of Pure White back in stock as well.

The assortment of filberts in the shop grew by three! We now carry Cameleon’s small, medium, and large filbert brushes.  These brushes have thick, soft bristles and a short, wood handle. You also may be happy to hear that we now have more of Cameleon’s popular petal brushes in stock again as well.

For our balloon twisting friends, I’ve added an assortment of 646q’s! Sometimes all it takes is an extra HUGE balloon to turn your standard designs into something spectacular!

Still on the way to us is some of Mehron’s white liquid makeup, which I tested out last week and mentioned in my recent post comparing the different white’s available. Stay tuned and happy painting!