Posted on — Leave a comment

Painted Jewelry Design: Blue Gem Necklace

I thought I’d share a design I did a while back and shared on Facebook, but forgot to add to my blog! Here’s a necklace design that I did for Illusion’s jewelry competition! Scroll down for step by step photos….

You can really do a LOT with just paint! I have no gemstones, glitter, or anything attached to this design.  Just paint and I used my fine brush. 

You can find some more in-depth instructions for painting jewels in my book, “Realism for Face and Body Artists!”

Happy painting!!  🙂

Posted on — 1 Comment

Halloween Face Paintin 2015!

We’ve had a great October here at Paintertainment! October is one of those months where face painters are often super busy.  I was not only busy with events, but also busy filling orders for all of my clients across the country who were stocking up on supplies for their own events!  Nowadays I don’t take on too many gigs because I also want to be available to celebrate with my boys.  However, I did take a few appointments during nap time on Halloween, and tried some ideas on myself!  Here are some of the paintings I did this month!

I had SO much fun painting this sweet family of four on Halloween this year!!

Family photo! Hoping they send me a pic with their costumes on, too!

Half skull! I did this for Illusion’s “scary Halloween” competition!

Half skull…my first attempt at a skull design! (besides my cartoony cheek art skulls!)
Experimenting with my Alex Hansen spider web stencil!

Some new Halloween cheek art ideas!

I love making Halloween CUTE! Some great designs to use google eyes on, too.

A Halloween kitty mask, inspired by a design on my Halloween kitchen towels! 😉

Frankenstein mask!  I used some gear stencils for texture here.


My boys dressed as the Wild Kratt Brothers! Sam was Martin with wolf powers, and Toby was Chris with eagle powers! I was happy they chose costumes that could incorporate some face painting! The wolf was very much inspired by Tina Carroll’s new book, “A Face Painting Trip to the Zoo!“
Some fun cheek art I did for a dog Halloween event!

Ghost design!

My first attempt at the headless horseman!

I hope you had a fun Halloween, whether you were busy working, busy having fun with your kids, or both!

Posted on — Leave a comment

NEW Products Just Added!

We’ve added several new products this week! Check them out…

Global pearl yellow and neon white
Collapsible 17-hole balloon sizer, $35.00

Polka dot 260’s! $17.99 for 50 assorted colors.

Star Wars faces, $17.99 for 100 5″ rounds

Blue Snowflakes-a-Round, $19.99 for 100 5″ balloons

Clear Snowflakes-a-Round, $19.99 for 100 5″ balloons

Anna and Elsa Hearts, $19.99 for 100 6″ balloons

Quick Cutter, 2-Pack for $24.00
Qualatex mini balloon kit, $20 for mini pump, book, and 48 balloons!
Posted on — Leave a comment

Paintertainment’s Glossary of Terms for Face Painters

Every career path brings with it a unique set of industry terminology, even face painting! For the benefit of new artists, I’ve created this face painter’s glossary of terms. Please feel free to contact me if you know of any terms that you think I’m missing, or if you’ve heard one somewhere that you aren’t familiar with…this is a working document!

A
Acrylic – Artist’s paint that you should NEVER use on skin. Here’s why.
Agent – Someone who does all the crummy, boring parts of booking gigs and hires you to do the fun part: painting! 😉
Arty Cake – Silly Farm’s brand of one stroke cakes.

B
BAM – Acronym for a stencil brand name, “Bad Ass Mini“
BAS – Acronym for a stencil brand name “Bad Ass Stencils“
Base Blender – TAG’s name for their large split cakes.
Blacklight – A type of light that some paints fluoresce when exposed to. Click here for more info.
Bling – Glitter, Rhinestones, and all things sparkly!
Booking Fee – A sum of money required by artists in order to book an event on their calendar. Usually applied to the final total due.
Brush Tub – A brush rinse water holder made by Loew-Cornell with ridges in the bottom.

C
Chapstick Sushi – A sushi cake made in a chapstick holder. Click here for how-to.
Cheek Art – Designs created to fit on one cheek. (Check out the Facebook group) Click here for an article with suggestions for achieving small details quickly!
Coffee Water – A term for dirty brush rinse water.
Contract – Something all professionals should use or aim to create in the future. Click for more.
Corporate Gig – A job done for a large company.
Cosmetic Glitter – Glitter that is approved for cosmetic use.
Craft-n-Go – A brand of case that can be used to hold supplies.

D
Dagger Brush – A brush with a long, pointed angle, great for painting whiskers!
Dauber – A round sponge attached to a stick/handle (aka Pouncer)
Deposit – A sum of money required by artists in order to book an event on their calendar. Usually applied to the final total due.
Detailz – A brand of detailed painting tool by Mehron.
DFX – A face paint product brand name, aka Diamond FX
DJ Hero Case – A video game accessory case often converted into a paint kit.
Double-Dip – A technique used to create two-toned shapes like flower petals.
Dotting Wand – A sponge tipped brush for creating dots.
Director’s Chair – A tall chair preferred by artists who like to stand while painting. 

E
Exposure – A useless “incentive” painters are often presented with in leu of payment. Also, something you can easily die from, especially here in Minnesota in winter.
Eye Design – A design created to go on or around the eye area.
Eyelash Adhesive – An adhesive often used to attach rhinestones and other things to skin.

F
FABATV – Subscription based online learning resource
FABAIC – Acronym for Face And Body Art International Convention.
FDA – Food and Drug Administration (USA) – may approve certain ingredients for use in cosmetics. Click here for more information about the FDA and neon makeup with uapproved pigments.
Fixer / Fixing Spray – A product sprayed on a painted face to help it last longer. There are also fixing/setting powders.
Filbert – A brush shape: flat with a rounded cut.
Finger Dauber – A dauber with a base that can slip over your fingertip.
Full Face – A design that covers the majority of the face.
FunStroke – A brand name of Global’s one stroke cakes.

G
Gig – A face painting job/event.
Gigmasters – A website that connects clients looking for entertainment with artists.
GigSalad – A website that connects clients looking for entertainment with artists.
Glitter Dust – A super fine glitter powder. Fine enough to dispense with a glitter brush.
Global – A face paint product brand name.
Glycerine Based – Makeup that is more transparent and good for blending and shading. Examples: Mehron’s Paradise, Kryolan’s Aquacolors, FAB and Snazaroo are glycerine based.
Grease Paint – Makeup that is not water based; requires a makeup remover to take off.
Guitar Case – A case formerly for a guitar, often converted into a paint kit.

H
HAS – Acronym for a stencil brand name “Half Ass Stencils“
Hourly Gig – A job you are being paid hourly for.
Hypoallergenic – A marketing buzz term that you should be wary of, because there is no science or regulation behind it.

I
INtense Pro – A brand of powders created by Mehron.
Independent Contractor – An artist who is hired out by agents but is responsible for their own taxes, etc.
Invisible Glove – A product designed to keep your hands from getting stained from paint.

J
Jam – When artists get together to practice and share with each other. Also good on toast.
Jewelry Trays – Plastic, sectioned trays often used by face painters to store and organize paints.

K
Kabuki – A big, fluffy brush.
Kit – A face painter’s tool box.  Also a constantly evolving obsession of many artists! 
Kryolan – A face paint product brand name.

L
Laptop Case – A plastic case for paints that is about the same shape/size as a laptop.
Linework – Term for the fine outlines done on a design. Wax based paints like Wolfe are great for linework.
Line Manager – Person in charge of keeping the line of kids in order and ending it on time.
Liquid Bling – Amerikan Body Art’s brand of glitter gel.
Load – The act of picking up paint with your brush.
Lollipop Blender – A foam pad on a stick, often used to apply powders.

M
Mehron – A face paint product brand name.
Menu – A board or book that shows what designs a painter can do.

N
Neon – Term used to describe fluorescent makeup. Click here for more info.
Newbie – Someone who consider themselves new to face painting.

O
One Stroke – A technique of loading one brush or sponge with multiple colors and applying them in one stroke of the brush/sponge. Click here for a book on this topic.
One Stroke Cake – A cake with multiple colors, sized to be loaded with a 3/4″-1″ wide flat brush.

P
PainterTemplate – Wipe-off face painting practice boards by Paintertainment
Paradise – A face paint product brand name.
Paypal –  A payment processing site that many artists use to collect payment. 
Pay-Per-Face Gig –  An event where you charge each customer for their individual face.
Petal Brush – A brush with a unique shape designed to create petal shapes.
Petal Pot –  Small paint pots designed for double dip petals. Click here for a how-to.
Petal Sponge –  A sponge cut into a petal or teardrop shape.
Poofer Bottle –  Small, plastic bottle with a nozzle, often used to “poof” glitter on the face.
Pouncer – A round sponge attached to a stick/handle (aka “Dauber”)
PPF – Acronym for “Pay-Per-Face”
Practice –  makes perfect!
Practice Head – A mannequin head used for practicing designs.
Professional – Someone who is paid to face paint.  Click here for a more in depth article.

R
Rainbow Cake – Another name for a split cake.
Rake Brush – A brush with gaps between bristles to create multiple lines at once.
Realism – The practice of painting realistic images.  Also, a book you can find here.
Retail Rate – The hourly rate that you charge the public when you book gigs on your own.
Ruby Red – A face paint product brand name.

S
SBS – Acronym for “step-by-step”
Script Brush – A long, narrow brush used for creating thin lines and scrolls.
SFX – Acronym for “Special Effects,” often refers to adding fake skin, blood, etc for realistic gore.
Smoothie Blender – A foam “brush”, often used for powders, with a handle like a brush.
Snazaroo – A face paint product brand name.
Speed Painting – Grueling conditions in which some painters may work (for an extra fee).
Special Request – A design requested by a client that is not on the menu.
Spirit Gum – A latex-free adhesive used to attach gems, google eyes, etc. to skin.
Split Cake – A cake of paint with multiple colors in it.
Square – A brand of credit card reader that some artists use to accept payment.
Starblend – A makeup made by Mehron that can be applied wet or as a powder.
Stipple Sponge – A coarse sponge often used to add texture.
Sushi Cake – A round split cake. Click here for instructions to make one.

T
TAG – A face paint product brand name.
TAP  – A brand name of stencils.
Teardrops – A shape that is used in many designs and practiced by professionals.
Tempera – Craft paint that you should NEVER use on skin. Here’s why.
Thick-to-Thin – Process of painting a teardrop shape starting on the thick end and ending on the thin end.
Thin-to-Thick – Process of painting a teardrop shape starting on the thin end and ending on the thick end. 
Thumbtack – A website that connects clients looking for entertainment with artists.
Travel – The fees charged for travel to/from a job. 

U
Undercut – Purposely charging much less than the going rate to win jobs from other artists.
UV – Ultraviolet – Term used to describe fluorescent makeup. Click here for more info.

W
Water Based – Makeup that is activated by and cleaned up with water.
Wax Based – Makeup that is more opaque and good for linework. Wolfe, TAG, Cameleon and Diamond FX are examples of wax based makeup.
Wholesale Rate – The reduced hourly rate that you are willing to work at for an agent.
Wolfe – A face paint product brand name.
Wolfe White/Black – An elusive product sought out by many and often sold out by many
Word Menu – A menu of designs displayed as words instead of pictures. Design one here.

Posted on — 1 Comment

When can I call myself a “PROFESSIONAL” face painter?

Our industry is a unique one, in that in the US at least, there really are no required certifications or regulations to bestow upon us the title of “professional.”  Most “legitimate” professions require some sort of experience, certification, degree or exam to give you that mark of a professional. When you walk into a hospital, you can pretty much assume that you will only see actual doctors and nurses who are qualified to do their job.  Not so with face painters. While this makes it a challenge for the general public to understand the difference in pricing among face painters and who to hire, it also poses a common question to those starting out in face painting that I hear often:

“When can I consider myself a PROFESSIONAL face painter?”

The short answer to this question is that if people are paying you for your time and talent, you are a professional. 

However, there are a lot of things that you may want to consider if you are looking to move from a hobbyist to a pro. Here are my top 10:

1. You are a talented artist, or at least a determined student. 
Having a natural talent for art is an obvious one when you are looking to be a professional artist.  There are, however, exceptions to this rule…I do know of some artists who were not naturally artistic and are still amazing face painters.  It just takes a LOT of work and practice to perfect the techniques of clean linework, teardrops, one strokes, etc.  If you are not a natural artist, you’ll find yourself focusing greatly on technique and the delicate science of structure and layout of your designs.  You will benefit greatly from conferences, workshops, and step-by-step’s. While this may make or break your decision to go pro, don’t get frustrated too early on…just know that you have a long road ahead. If you have enough passion, you’ll get through.  I liken this to myself with the piano. I knew kids who played flawlessly by ear when I was growing up, and who couldn’t read a note of sheet music.  I went to weekly lessons for 10 years and can play some songs really well, but only after months and months of practice on every song. I am NOT a natural musician.  But if you heard me play one song I know well, you might THINK I was and that’s all that the client sees when you’re hired.

2. You invest in quality supplies. 
Some painters start as volunteers, being provided craft paints.  Many painters start out with actual face painting kits from their local craft store…then the first time they try out a more professional set, they are floored by the quality and never turn back.  Even the most talented, seasoned professional will struggle to create beautiful art with crummy supplies.  Whatever paints you use, it is of utmost importance that you ONLY use makeups made with ingredients that are FDA compliant for cosmetic use, including your glitters, for the safety of your customers.  Click here for an in-depth article on the importance of using safe products.  Your brush quality is also very important for achieving clean linework.  Good, quality brushes do what YOU want them to do, not what THEY want to do. My kit contains around $1,500.00 worth of paint and tools at an average event, and that doesn’t include all the specialty tools I may leave at home for other specific events.  You don’t need THAT much paint to start out, but you do need quality. It’s better to start with a small amount of quality tools than a big box of cheap supplies.  Click here for a special package deal on the basics that I recommend for those who are serious about going pro.

3. You paint people you don’t know.
When you are just starting out, chances are you will start by painting people you know…your own kids for Halloween, your niece or nephew’s birthday party, or volunteering at your church or kids’ school events.  Once you realize all of the time and expense that goes into good face painting and decide your skill level is enough to start charging, it’s time to seek out actual clients.  Many artists feel like they’ve “arrived” once they book a party of someone they don’t know.  There’s something validating about having a total stranger willing to pay you to do something, knowing they aren’t just hiring you because you are related and they want to help you out.

4. You have an online presence.
This is not something that has to cost you a lot of money to start.  Start with a Facebook business page or a blog for free.  These days a professional MUST have some sort of address in cyberspace where clients can find their contact information, samples of their work, FAQ’s and client testimonials.  Spend $10 on Vistaprint to get yourself a set of business cards to hand out to potential clients.  You can’t reach point #3 without having some way for those strangers to get ahold of you!

5. You do your research.
If you are serious about becoming a professional face painter, you will do your research on the profession.  (and yes, it is an actual full time profession for many!) You will seek out more knowledge and skills by joining face painting related Facebook groups (don’t be alarmed by the VAST NUMBER of face painting groups!), you might purchase books to learn new skills and designs, you might attend local face painting workshops and jams.  You will invest in a practice head, wipe-off practice sheets, or chase down every child in sight and get to the point of bribing your kids to let you paint them AGAIN.  You might go as far as to attend one of the many national and international face and body painting conventions, or subscribe to FABATV to continue your learning.  Or, you may simply scour Youtube or our learning page for free tips and tricks.  However you choose to learn and grow, professional face painters never stop doing this. We are always striving to learn the latest techniques, whether we decide to adopt them into our methods or not. It is a true sign of someone who is passionate about what they do.

6. You are insured.
Most “professional” face painters have liability insurance.  If you don’t have it yet, as long as you are growing your client list, sooner or later it will be required of you.  Most fairs and festivals require that you have at least several million dollars of coverage (and will require an insurance certificate with them listed as “additional insured), and that is what gave me the nudge to get insured.  18 years ago when I did my first county fair, I needed insurance.  Many corporate clients will only hire insured artists as well.

7. You have an established business name.
I’ve been going by the name Paintertainment for most of my 20 years in the business, and have owned Paintertainment.com for 18 years.  However, I did at one point have to actually register my business name with my secretary of state in order to keep one of my long time clients (a government gig).  They would not issue a paycheck to me otherwise. It cost me about $250 in the end to register my name.  (About $30 for the actual registration…the rest was the cost to be published in a legal newspaper for 2 consecutive weeks which is required to make your registration valid).  That sucked up most of my profit on that year’s gig, but has enabled me to keep getting that annual job and also protect my business name.

8. You charge the going rate.
Many-a-full time face painter have been hurt by people who paint “just for fun” or “on the side” at insultingly low rates.  Of course it IS good practice to charge less when you are just starting out and trying to gain experience…as long as you let your clients know that and aim to raise your rates. (for example, let customers know this is an introductory rate that is only good for so many months, then your rate will be going up. Or run a promotion where if you book 1 hour, you get one free, for a limited time.)  Undercutting hurts us all because it brings down our perceived value and worth with the community…something that professional painters work very hard to uphold. For an in-depth article on what to consider when figuring out your rates, click here.

9. You use contracts.
If you have any plans to continue face painting for income, it’s not a matter of IF but a matter of WHEN you will absolutely need a written contract.  It is smart to start using one as soon as possible, before you feel you need one, because the situation that forces you to realize it is a must will most likely not be a pleasant one.  Contracts are not only important to protect you, but your client as well.  Managing your clients’ expectations can prevent 90% of the things that go wrong in our business, and nothing helps manage expectations like putting things in writing!  Click here for some suggestions as to what to put in your contract.

10. You know your worth.
Don’t expect clients to see and understand your worth and value if you don’t yourself.  Having confidence in your pricing and your own booking processes can take some time to build up when you’re new, but you don’t have to let your clients know this. When asked for their price, a professional gives it with confidence,  and is willing to walk away from clients who are not willing to compensate them for their time, investment and abilities. Professionals don’t cave under the client’s pressure to paint for a reduced rate or a crowd they can’t handle…they recognize that clients contact them because THEY are the face painting experts, and they educate their clients as to what is needed for their events to be successful…not the other way around. 

Not ALL of these things are required to call yourself a professional.  (Although I’d be willing to argue that #1-5 are required!) It took me a few years to realize I needed insurance.  I didn’t use contracts for years.  Over time I learned these lessons the hard way.  But in my opinion, and it’s only my opinion, as long as you at least are aware of all of these things and have them all as goals in your near future, you are a professional.  You take your business seriously for what it is…a business that deserves your time, attention, and respect in order to thrive.

I hope this article was helpful for those of you wondering where you stand in the face painting community!  Got more suggestions? Feel free to post comments! In the near future I will write again about what things you may need to turn face painting from a side job to a full time career.  Happy painting! 🙂

Posted on — Leave a comment

New Paintertainment “PainterTemplates” Face Painting Templates!

I’m excited to announce a new product that has been in my head and in the works for years…now that my boys are in school I’ve been able to follow it through to completion!

Introducing our new…

PainterTemplates by Paintertainment!

All 6 sides of our 3 new practice templates, with a few sample paintings!

For years I’ve been wondering why so may painters have been using practice sheets with stoic, mannequin-like illustrations or creepy 3D computer-modeled hairless heads, when they are such a far cry from the actual, happy customers we paint in real life?  This prompted me to create PainterTemplates. 

the two sides of the “Woman” sheet

Our practice templates are printed on letter sized paper and protected with a heavy 5 mil laminate, perfect for painting, wiping off, and painting again!

the two sides of the “Girl” sheet

But what makes our templates different than others?

  • Printed on light gray paper, so you can still see your white paint!
  • The people are actually happy!
  • The illustrations are full scale, meaning you don’t need to downsize your one stroke brushes and cakes to do real-life-sized practice designs.
  • Each comes with 2 faces: a front view on one side and a side view on the other.
the two sides of the “Boy” sheet

You can find these two-sided sheets here for just $6 each! Choose boy, girl, or woman. We will have more coming in the future so stay tuned!

Thanks for stopping by, and happy painting! 🙂

Posted on — Leave a comment

Minnesota Family Entertainers & Artists’ Business Conference – Sept 2015

I had the MOST amazing time as a speaker and an attendee of the MN Family Entertainers and Artists’ Business Conference last week!

Carpoolin’ to the Conference!

The conference was orchestrated and hosted by Lori Hurley, our own local family entertainment goddess who not only runs an incredibly successful business, but has published two books and spoken at numerous conventions around the country on the topic of business.  Her willingness to not only share her own expertise, but encourage other local entrepreneurs to do the same, is evidence of our belief that if we work together for the good of our industry, it benefits us ALL in the end.

 
A few old friends and a few new ones!
Many talented artists from across multiple disciplines, coming together for one common goal to grow our businesses!!

I have seen this time and time again as I host as many local jam sessions as I can squeeze in my calendar.  I am not an expert on every aspect of face painting, and I don’t ever want to be.  I learn something new from my “painty friends” every time we get together, and I hope they learn from me as well.  Every time we bring another local artist into the fold, I see our support and networking benefiting all sides.  Not just me and my friends, but also our clients!!  We are consistently raising the bar here in the Twin Cities and it’s really showing!

Ready for the next speaker!

But back to my recap of the conference!

On September 22nd Lori opened her home to over a dozen local artists.  Face painters, balloon twisters, henna artists, magicians, clowns…we were all there together for the common goal of growing and transforming our businesses.  The cost of this first “pilot” conference was just $50.  Attendance was capped at just enough to really get into some good networking and conversation, but not enough to require the costs to rent a space.

Four local artists gave 6 presentations throughout the morning and afternoon:

David Walbridge gave great tips on how to add value by adding fun and humor to our work, and four things to think about when creating a character for yourself.  David encouraged us to take the time to really have fun with each and every “small person” we work with, and not only gave us many great insights, but catchy insights that rhymed!

Lori Hurley talked about how to get paid faster…seriously, who doesn’t want that?! She also gave us some incredibly useful advice for creating effective contracts that manage clients’ expectations and minimize preventable headaches, generously walking us through her own contract verbiage. 

Cindy Trusty gave us the permission and that many of us needed to give ourselves a raise! We learned how far our own confidence in ourselves and our rates can go, and when the best time is to raise your rates.  Cindy made it personal with real life stories from her own experience which were priceless!

I (Gretchen Fleener) spoke on two topics: Creative ways to advertise for little or no money, and how to design a pay-per-face booth that does the selling for you.

The conference followed a format similar to TED Talks, where each speaker had strictly timed slots to speak within.  Questions were not allowed during the talk, but were written down and handed to the speaker at the end.  The format was really great in my opinion…it enabled us to really focus and get everything we could out of the time we had.  I’m a huge fan of efficiency and not wasting time!

Lori encouraged us all to write down 3 action items after every speaker to take home and implement in our businesses, which was an excellent exercise and gave us a clear list of the valuable items we all took away from this conference.  I am already working on implementing some of my to-do’s and hope to get through all of them soon!

At the end attendees had one more opportunity to hand in questions, which the entire panel of speakers answered.

I really loved many aspects of this conference:

  • Structure – I didn’t feel like a single moment of time was wasted! (my hugest pet peeve!)
  • Content – Presenters have a way of cutting to the good stuff when they only have 15 minutes!
  • Collaboration – Imagine a world where your “competition” actually helps you succeed!
  • Bang for your Buck – $50 is a steal for any class or conference, but the sheer amount of actual value we got out of each speaker was amazing. And you can’t beat the savings of having a conference in your own back yard!

This was a “pilot project,” but I am hoping we have another one soon!! Be sure to watch our Facebook page as I will definitely share it again if we do another!

Posted on — Leave a comment

Crowd Control Tips

If you’ve been face painting for even a short amount of time, chances are you’ve been swallowed up by the crowd at at least one event.  You’ve literally felt the breath of onlookers on your neck, had your table bumped countless times, and have been asked “where’s the line?” by endless parents.

If you’re smart, you’ve used this as a learning opportunity to improve things for next time.  Maybe you’ve vowed not to do large gigs without bringing along additional painters.  Maybe you’ve decided that big crowds just aren’t your thing, and you don’t even bid on these types of gigs.  Or perhaps you’re still contemplating how to control the crowds and make it a better experience next time.  If so, this blog is for you…today I’m going to share some of the new tools that I have in my arsenal for controlling crowds!

Crowd control is all about providing order, and in turn, comfort for you and less confusion for the party guests.  Standing in a “blob” of people and trying to keep track of who’s next is just as frustrating for parents as being engulfed by said blob is for you.  Parents are having a hard enough time keeping track of their rambunctious kiddos, so if you can put out some visual cues that are as obvious to the kids as they are to the parents, it’s a win for everyone!

Here are some ways to mold that blob into a line, and even give yourself a little breathing room!

Define where the line should START:

“Where is the line?”  I’ve been asked this question too many times at this event, so I bought this great arrow sign online to use this year.  Yes, it was $63 bucks.  Yes, it looked ENORMOUS in my kitchen.  But when I put it outside it was really about the right size, it worked as a connection point for my chain, and finally…finally…not ONCE did anyone ask “where is the line?”  Worth every penny in my opinion!

This sign is a magnetic white board, so you can write whatever you want on it. I made a laminated sign with magnets on the back so I could pull it down and put up a “closed” sign at the end. The arrow is adjustable so you can angle it as you please.  The post breaks down into two pieces, and the base can be weighted down with sand or water. I had to go add some water to it as it initially fell over a couple times.  But with a little water, it held up great the rest of the night.

Define where the line should STOP:

If you don’t tell the line where to stop, it will stop practically in your lap.  I came across this fantastic idea in a Facebook group.  I actually designed my own mat on the computer (I have a design background). I gave it a couple coats of fabric waterproofing spray, and now I can simply hose it off to get it clean! You can purchase this mat HERE!

There are other methods you can use to mark a spot for kids to wait too:
– Put down a piece of duct tape on the ground.
– Keep a piece of sidewalk chalk in your kit to mark the ground when working on pavement.

However you mark your spot, it really helps to be able to tell the kids, “please wait behind the line!” or “Put your feet on the clown’s feet if you want to be next!” 

Define YOUR Space:
Defining your own space is just as important as defining the line.  Make it clear where kids aren’t supposed to go, but make sure you leave plenty of room for them to get around where they ARE supposed to be.
I bought 32 feet of plastic chain on Amazon.  I also have a big string of triangle pennants that works as well.  In the photos below I attached the chain to my signage because we were on concrete. However, if I am in the grass, I have some pig tail posts and they are great for roping off an area!
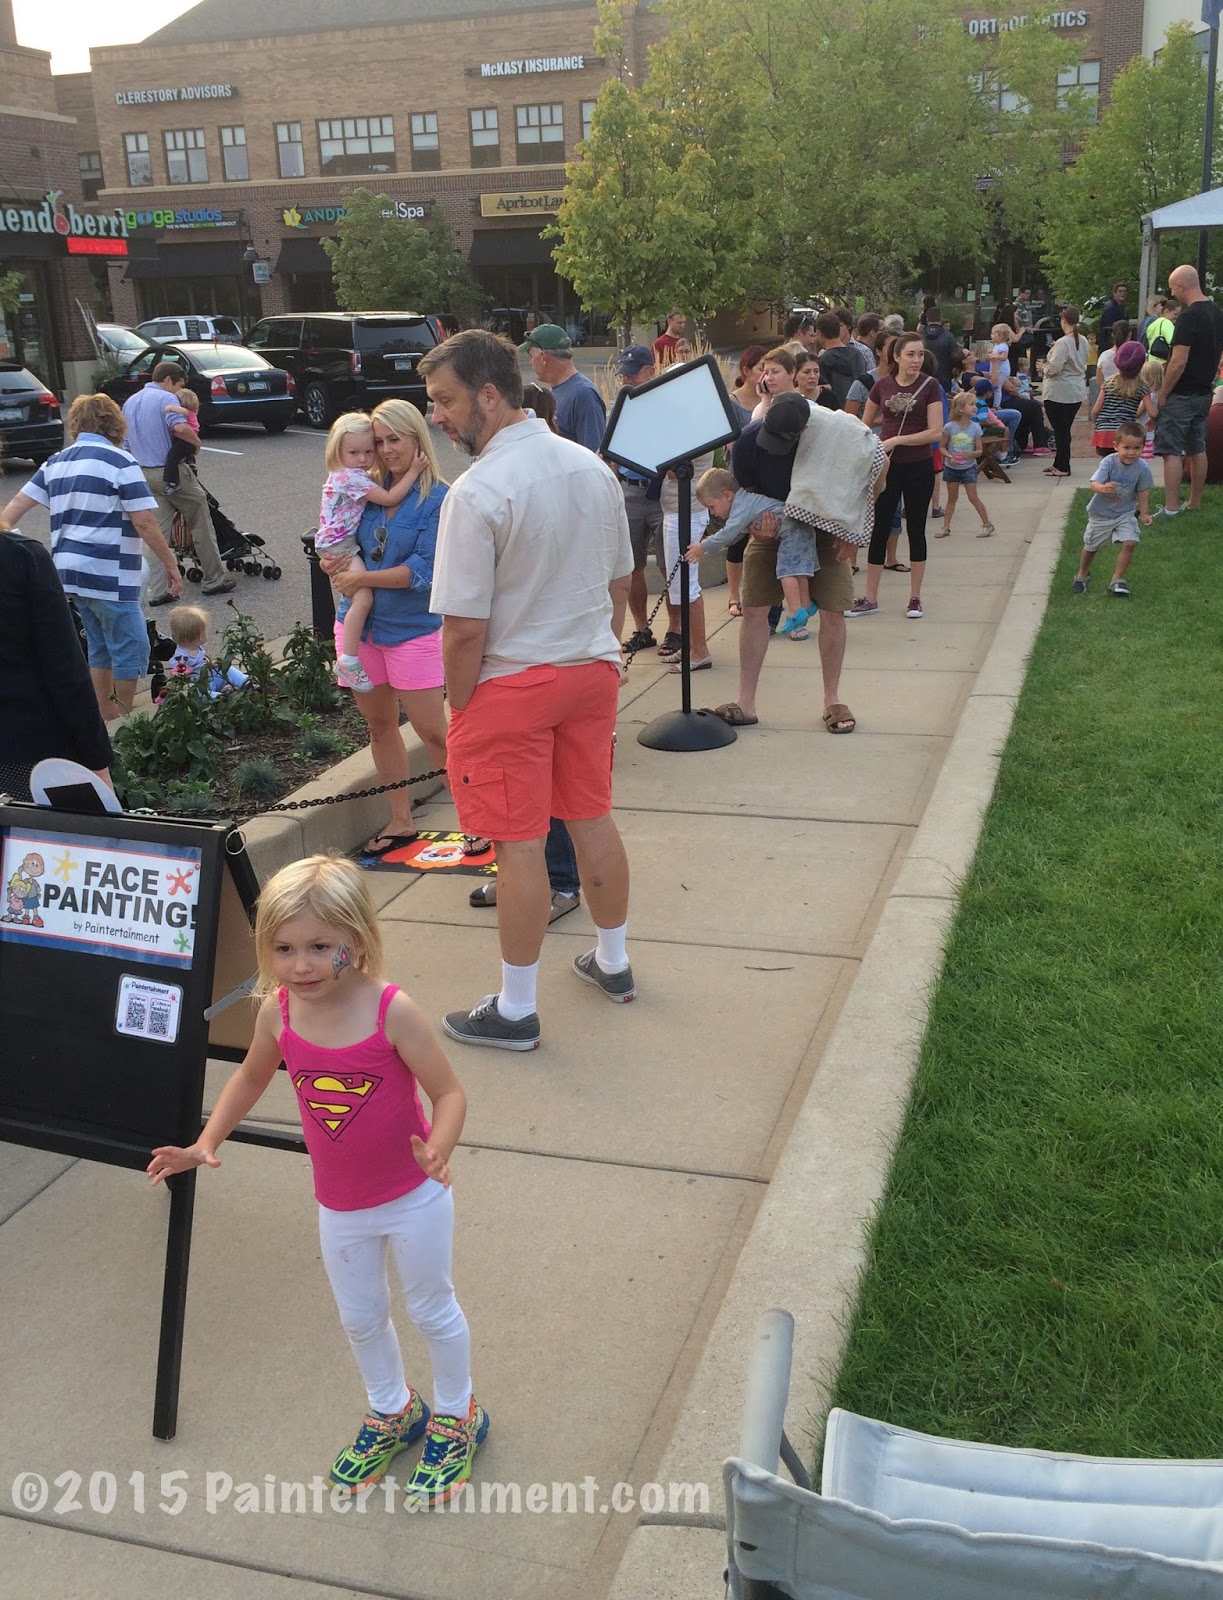
You’d never know from this picture that there is a line at least 20 kids deep just off screen!
The lineup you couldn’t see in the last pic!
Defining your space is really important for reducing your own stress level, not to mention messy spills, damage to your kit or messy fingertips of passers-by. I personally am used to being climbed on, bumped, breathed and coughed on, but keeping my space clear is good for many other reasons too.  It makes each child feel extra special that they are the only ones allowed in that space for their own special time to be painted.  It gives the parent a chance to exhale and know that they can see their child among the crowd, set their purse down, park their stroller and enjoy the experience too.
After we started painting I actually moved the chain from the left to the right corner of the design menu, so the board was out of our walk way.

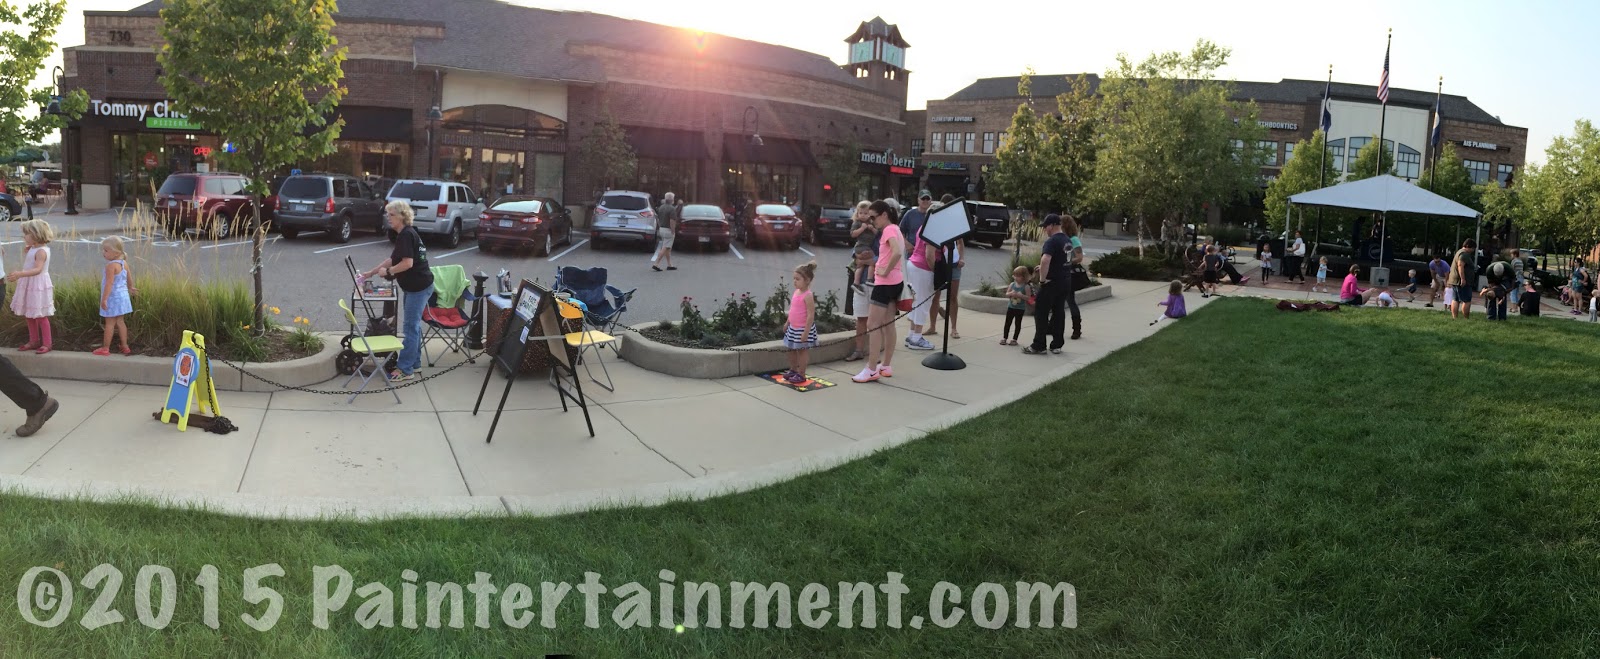
This was an event I painted at just this week.  It’s one of my busiest annual events, and we painted probably close to 150 kids or so in just 2 hours, but we never felt crowded.  Behind us are pillars (blocked by our chairs), and together with the street and curb, people don’t congregate behind us.  The chain not only defines the line, but also blocks off space for the kids and parents to get in the chair, get out, and leave to the left.  It also prevents people from forming two lines for two painters.  There is one spot to wait, on the mat, and whoever is available next paints that child.

Panoramic view of us along the sidewalk.

Define where to go when kids are DONE.

Once the kids are done being painted, they need a clear exit…preferably in the opposite direction of the original line to prevent more traffic congestion.

“Exit Only” tells people that the line does not form here. On the other side I had a “1 design per child” sign, so they knew when they left the chair that it would not be worth their time to get back in the line.

I found this little plastic tent sign at a thrift store, which once said “slow; children at play.”  I spray painted the blue part, glued on a circle of magnetic-receptive vinyl, and then made interchangeable magnetic signs that I can put in that circle.  So, this little sign performs several functions at any one event.

My sign with interchangeable graphics

The arrow can be turned in any direction as it attaches with velcro! The larger circle attaches to the sign with magnets.

Define the end of your shift.

Ending the line is one of the toughest parts of our job as face painter.  If we painted every parent who asked for “just one more,” we’d never get home to our own families.  We are not painting machines…we need to end at some point, and go put our own little honeys to bed.  I did a whole e-newsletter on tips for cutting off the line.  With this week’s event it’s easy because we lose all our sunlight by the end, and everyone naturally goes home!  But, it is still important to give some signal that the line is ending, or at least let those still in line know that continuing to wait is futile.

Magnetic signs to the rescue…I simply moved my little yellow sign to where the line forms, with a “sorry, we’re closed” sign, and swap out the “line forms here” sign with another closed sign.

I also have a “Open until” sign that attaches with magnets, where I can write in my end time.  This lets everyone know when we are closed for business.

My design menu is all attached with magnets as well.  So, if needed I can remove my design menu in mere seconds, and slap up a “closed” sign in it’s place.  It helps close the line when kids can’t see all the design options!

There are many ways to end the line. I have a sash that I can have the last kid wear that says “sorry, I’m the last person to be painted today!” I also have Tyvek wristbands I can give to the last however many kids in line.  Some people hand out tickets, poker chips, or stickers to the last kids in line.  If you don’t have a ticket, you don’t get painted.  

When you are approaching the end of your shift, hand out as many tickets as you think you can paint in the time remaining, then put out your “closed” sign behind the line.

I did this recently at an event for another artist friend of mine. She had a pouch of “tickets” (little foam shapes) and I just handed out as many as I thought I could paint in the last half hour.  When the last kid with a ticket was painted, we were done.  I made these little laminated tickets above for the same purpose, although the sun setting ended this gig for us so we didn’t need them this time.
I hope this helps you with your future HUGE events! It sure made an enormous difference for us this year at this particular event, and I now feel totally prepared for crowded events.  Got your own huge event coming up and need a face painting team with crowd control solutions? Hire us here!


Posted on — Leave a comment

Never Settle for Being the Best: My Journey from Cheek Art to Full Face Painting

I’ve been in the face and body painting business for 20 years now.  I still have so much to learn!  I’m determined NOT to settle on thinking that I’m the best at anything…I always have something to improve upon and learn, and hope to keep it that way as long as I’m around!

17 years into it I felt that I had pretty well mastered cheek art, so I thought I’d finally branch out into the world of full face designs. (Yeah, I know…took me long enough, right?!) The art of face painting has really grown drastically over the years and I didn’t want to be left behind!

A full face made of cheek art?! I did a little experimenting with what defines a full face vs half face vs cheek art…

I still remain a huge advocate of the benefits of offering cheek art, strive to help others learn how to do cheek art just as amazing AND fast, and even run a cheek art face painting group on Facebook.  Cheek art still remains the #1 request at my county fair.  However, I am always trying new techniques and tips, and had to give full faces a try.

In 2011 I began offering full faces in my pay-per-face county fair booth, along with my cheek art! Now that I look back on the photos I had put on my design menu, I can really say I’ve come a long way!  I have a LONG ways to go and have learned so much from my peers.  Heck, before Facebook came along I really had no idea how far face painting had come and could go!!

Here are some pics of my journey from then until now.  You can see my awkward attempts to transfer my cheek art versions into full face versions at first…

Butterflies and tigers are still my nemesis! I used to try to cover the whole face with butterflies that just looked awkward.  I have since lightened them up a bit, and I think they look better. I still am not happy with my butterflies’ bodies and antennae, but hey, we all have stuff to keep improving, right?!

I actually put that one on the left on my banner.  MY BANNER!! Ugh, bless the heart of this little girl who loved her tiger, but oh my, I’m so much better now! Tigers are SO tough for me and I’m still working on them to this day! This one on the right I just did a few weeks ago on my little boy…also still new to Starblends which I used for the base!

My first full face spidey on the left..today’s Spidey on the right with a little extra “pop” of graffiti eyes stencils!

I still have a LOT to learn and improve upon with my full faces and will probably never look at a picture of my work without critiquing myself!!  But I think the desire to keep improving is what makes artists great.

Besides improving my full faces, in my attempt to branch out beyond full faces has also taught me:

– Ways to improve my speed on ALL designs by adding more brush sizes and shapes to my tools
– the value and wow factor that stencils can bring
– one stroke techniques
– double-dip techniques
– teardrops!!
– the pro’s and con’s of using Starblends
– How awesome bling, google eyes, and feathers can be 
– that I prefer large brushes & lollipop blenders to sponges

My drive to learn and improve has pushed me to learn and now offer balloon twisting and henna body art as well, and those have been some incredibly fun learning experiences!!

Are you stuck in a full face rut and frustrated with cheek art? Practice it!! Are you stuck in a cheek art rut and frustrated with full faces? Practice them!!  Maybe you’ll find they’re not you’re thing, but the journey of trying and stretching yourself will teach you so much that can only improve your work!

Stretching yourself can be tough because it means admitting that you are not the best; that you have room to grow.  My hope is that I never settle on my talents as they are…that I will continue to make myself learn and grow. Sure, along the way I may find that the latest technique is not for me, but at least I can say I’ve tried it and can speak from actual experience. That’s all people really want to hear about anyway, right?

Posted on — Leave a comment

Carver County Fair 2015 Recap

Last week I tucked my 18th county fair under my belt…this being my 3rd year at Carver County Fair!  2015 was a great year and I thoroughly enjoyed painting so many adorable faces!!! If you’re coming to this post via my Pinterest pin on cheek art, scroll down for a bunch more! If you’re interested in learning to do simple, quick cheek art yourself, be sure to check out my book, “Classic Carnival Cheek Art! We also have package deals for those new to face painting that include everything you need to get started, and an awesome page of FREE learning resources!

Setting up the booth…
The fair starts on Wednesday, and this year I loaded up my booth and boys and we set up Tuesday morning.

All packed in and heading to the fair!
The boys are just excited to play games on my iPod and iPad while I set up. You can tell they never play video games in our house, only on trips and in waiting rooms, ha! But they were thoroughly entertained! I keep telling them someday they’ll be taller than me and will have big muscles to help Mommy load and unload my booth!
The booth all set up and running! This was taken on the last day when my hubby and boys came to visit me!  I always want my booth looking as sharp on the last day as it does the first.  I do a lot of cleaning every night and when I have time between paintings!
This is the view when walking into the building of where I work.

New this year…
I had a totally new setup this year with my chairs. I now do most of my parties standing up with kids in this tall director’s chair! However, my back and feet wouldn’t be able to take multiple 12 hour days standing up.  So, I decided to bring along my hydraulic stool that I use when I do belly paintings. It worked great! The kids got to sit up high and feel like royalty, and I had the option to sit or stand depending on how I felt and how tall the kids were.

Add caption

 Photo prop boards were a new and fun addition this year! My new photo props fit nicely on the little fabric shelf under the director’s chair, and I’d pull them out whenever someone had a face that fit with the board…

Say cheese!!
Me trying out the county fair board!
A popular ice princess design!! A few booths down they had cardboard cutouts of Anna, Elsa and Olaf to take photos by too which was fun for the kids!
Just chillin’ with Tippy the cow…

(If you’re interested in adding fun photo prop boards to your own gigs, I have the files for purchase to print your own set!)

Also new this year was this small safety information sheet I had out on the table, educating parents on what to watch out for when allowing their children to be painted.  It’s really shocking how many events offer free face painting that is not face paint at all, but tempera, acrylic, and other unsafe craft paints & glitter.   Click here for my in-depth article on why “non-toxic” paint is NOT safe for skin. I had so many parents thank me for this information!

There was another person painting at the fair this year with questionable paints in jars,  and more than once I was asked by the parent to wipe it off and paint something else before they even saw this flyer.  Unfortunately whatever it was stained badly. Safe face paints can stain too, depending on your body chemistry and the colors of the paint.  Some brands’ blues and greens stain more, etc. You can see my analysis of what professional brands stain the most/least here.  If you ever have this happen, at least if it is face paint, try applying a little lotion to the skin. Wait 20-30 minutes and then try washing again.  Usually this helps to release the paint. Do NOT ever clean face paint off with baby wipes! They have been known to cause awful reactions on kids’ faces no matter what type of paint is used.  I tell people to remove with a gentle soap and water.  The best way is to lather it up with liquid soap (BEFORE getting it wet), loosen up the paint, and then rinse with water.  This is the best way to prevent staining during removal.

Anyway, back to the fair…

Also new this year was basically my entire paint kit.  My kit changes frequently but this year it grew so much, I’ve outgrown my countertop! Time to make a few modifications for next year!

My boys sent little stuffed dogs with me each day at the fair to keep me company in my booth. 🙂

Designs…
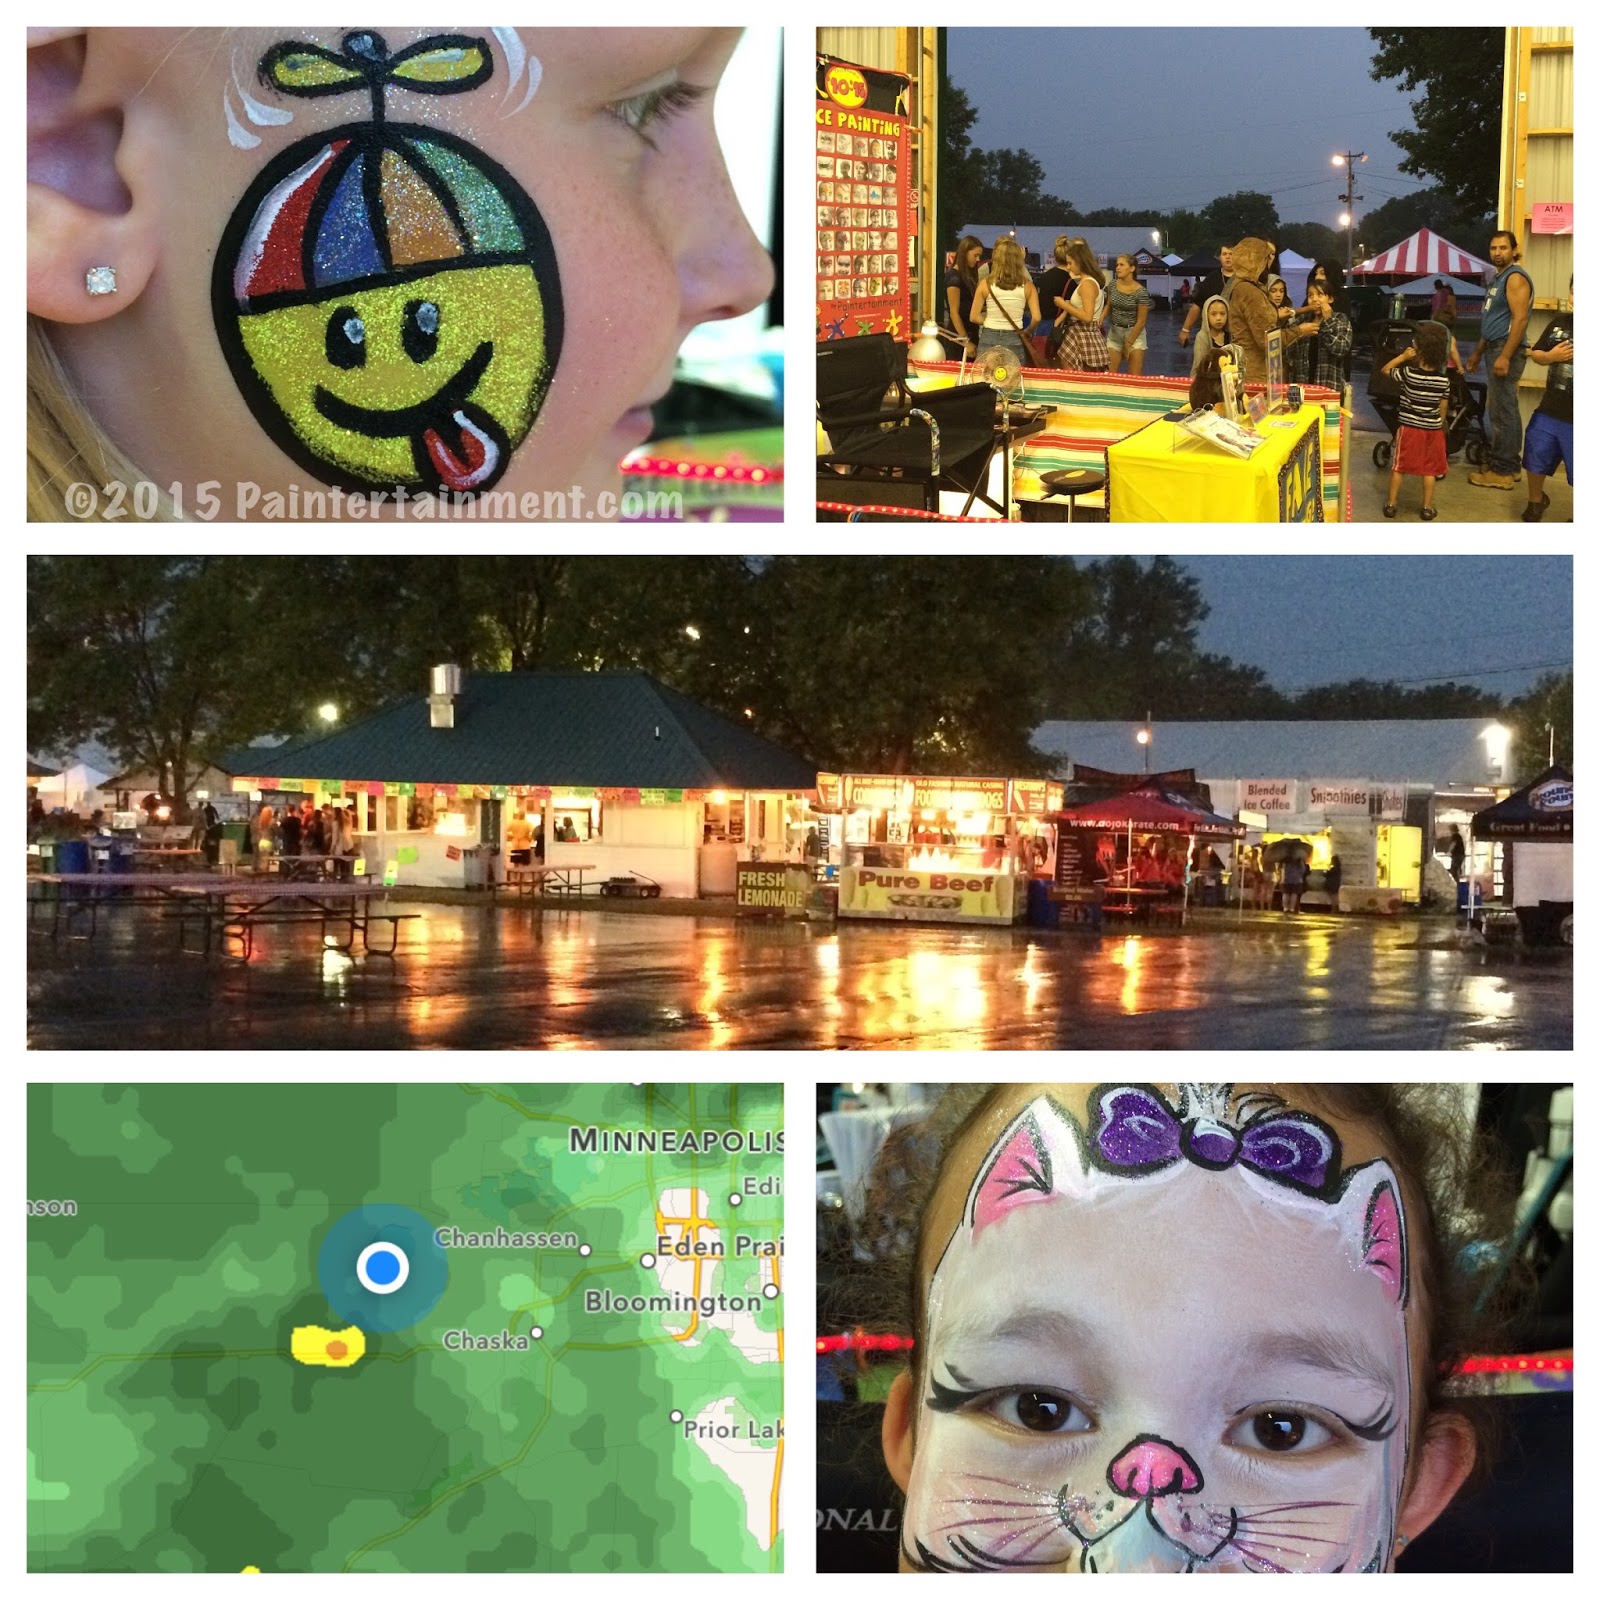
A few of the designs I did this year… Cheek art still remains one of the most requested forms of painting for me.  And, being one of the very few artists in the Twin Cities who is faster at cheeks than full faces, I still am able to do them and offer them for less than full faces.  However, in general, most painters prefer doing full faces as cheek art requires a lot of precision in a small space with little to no room for error, which takes longer.  For now, I’ll keep offering it as people love it and I’m convinced it can be just as awesome!! It also works well at the fair when kids faces are often carrying the remnants of all that good, greasy, sticky fair food!! 😉  I paint a LOT of arms, too.  Sometimes kids ask for their hands.  Usually I then suggest just above their wrist…that way they can still wash hands after petting the animals and eating cotton candy without losing their artwork.  But, I’ve been doing a lot of full face, half face, and eye designs these past few years and they are very popular!

These two friends wanted to split a design, literally!
Gotta love it when someone dares their friends to get painted, and they actually go through with it!
My mom painted at the booth on Thursday so I could visit with my boys!
Thursday  night we had a storm roll through and were told we could close up early! These are the days I love being in a building, versus a tent outside!
My little man Sam wanted me to paint Mercy Watson the pig on his arm! 🙂

My Arm Designs…
Every year I paint elaborate things on my own arm.  I love doing this in between customers, or when there is a lull in business during the day.  However, being that this was my busiest fair in my history of doing fairs, with 4 out of 5 of the days being record breakers, I didn’t have as much time to paint myself.  Here are a few things I did though, some quick and some not so quick…

Quick roses, done with Global Hobart.  Love that cake!
This was my most detailed arm design for this year…Inside Out! Love that movie!!
Closeup of “Sadness” and “Anger”
Closeup of Disgust and Joy…
I did this little design to go along with the henna I had already done on my hand!

 Big thanks to all of you who stopped by my booth this year and made it my best year ever! See you in 2016!!

Me and Toby taking a lunch break