

Happy Tuesday! Today I am going to share a great trick that I came up with to create really quick but detailed gems using a Nerf Dart and foam daubers!
how to paint, step by step
Happy Tuesday! Today I am going to share a great trick that I came up with to create really quick but detailed gems using a Nerf Dart and foam daubers!

Happy Tuesday and happy independence day!! Today I thought it would be fitting to show you 6 different ways to paint fireworks!
I hope you have a fun filled day of painting patriotic designs…please feel free to comment and share what YOU painted this year!


Happy Tuesday! Since my team and I will be painting some fun feather designs to complement our owl bling this week at the MN State Fairgrounds, I thought I’d do a little tutorial on painting feathers! How do you use feathers in your designs? Please feel free to comment and share your own feather related designs and tips! Thanks so much for stopping by!

It’s Tuesday! Today I am frantically prepping to run my Glitter Glamper booth at the Kickoff to Summer event at the MN State Fairgrounds, so I decided to resurrect an old video! Check out this video for my tips to create a perfect Yin and Yang…they are much harder than they look and people often ask me how I paint them. Watch to see what I do!
Last week my website host was malfunctioning and I was not able to share my tip here on my blog, so below is last week’s tip. Unfortunately WordPress seems to let me down often, so if you check my blog again and find nothing on Tuesday at 10, be sure to check out my Facebook page as I’ve had the best luck so far getting my scheduled posts to show there! Thanks so much for watching!

Happy Tuesday! Since Star Wars Day is just a couple days away, this week I decided to incorporate a Death Star design into my tip! The death star is a perfect example to show how lighting and shadows change on a convex sphere, vs a concave dimple. Check out today’s video for a mini lighting & shadows lesson and a fun design to use this Thursday!
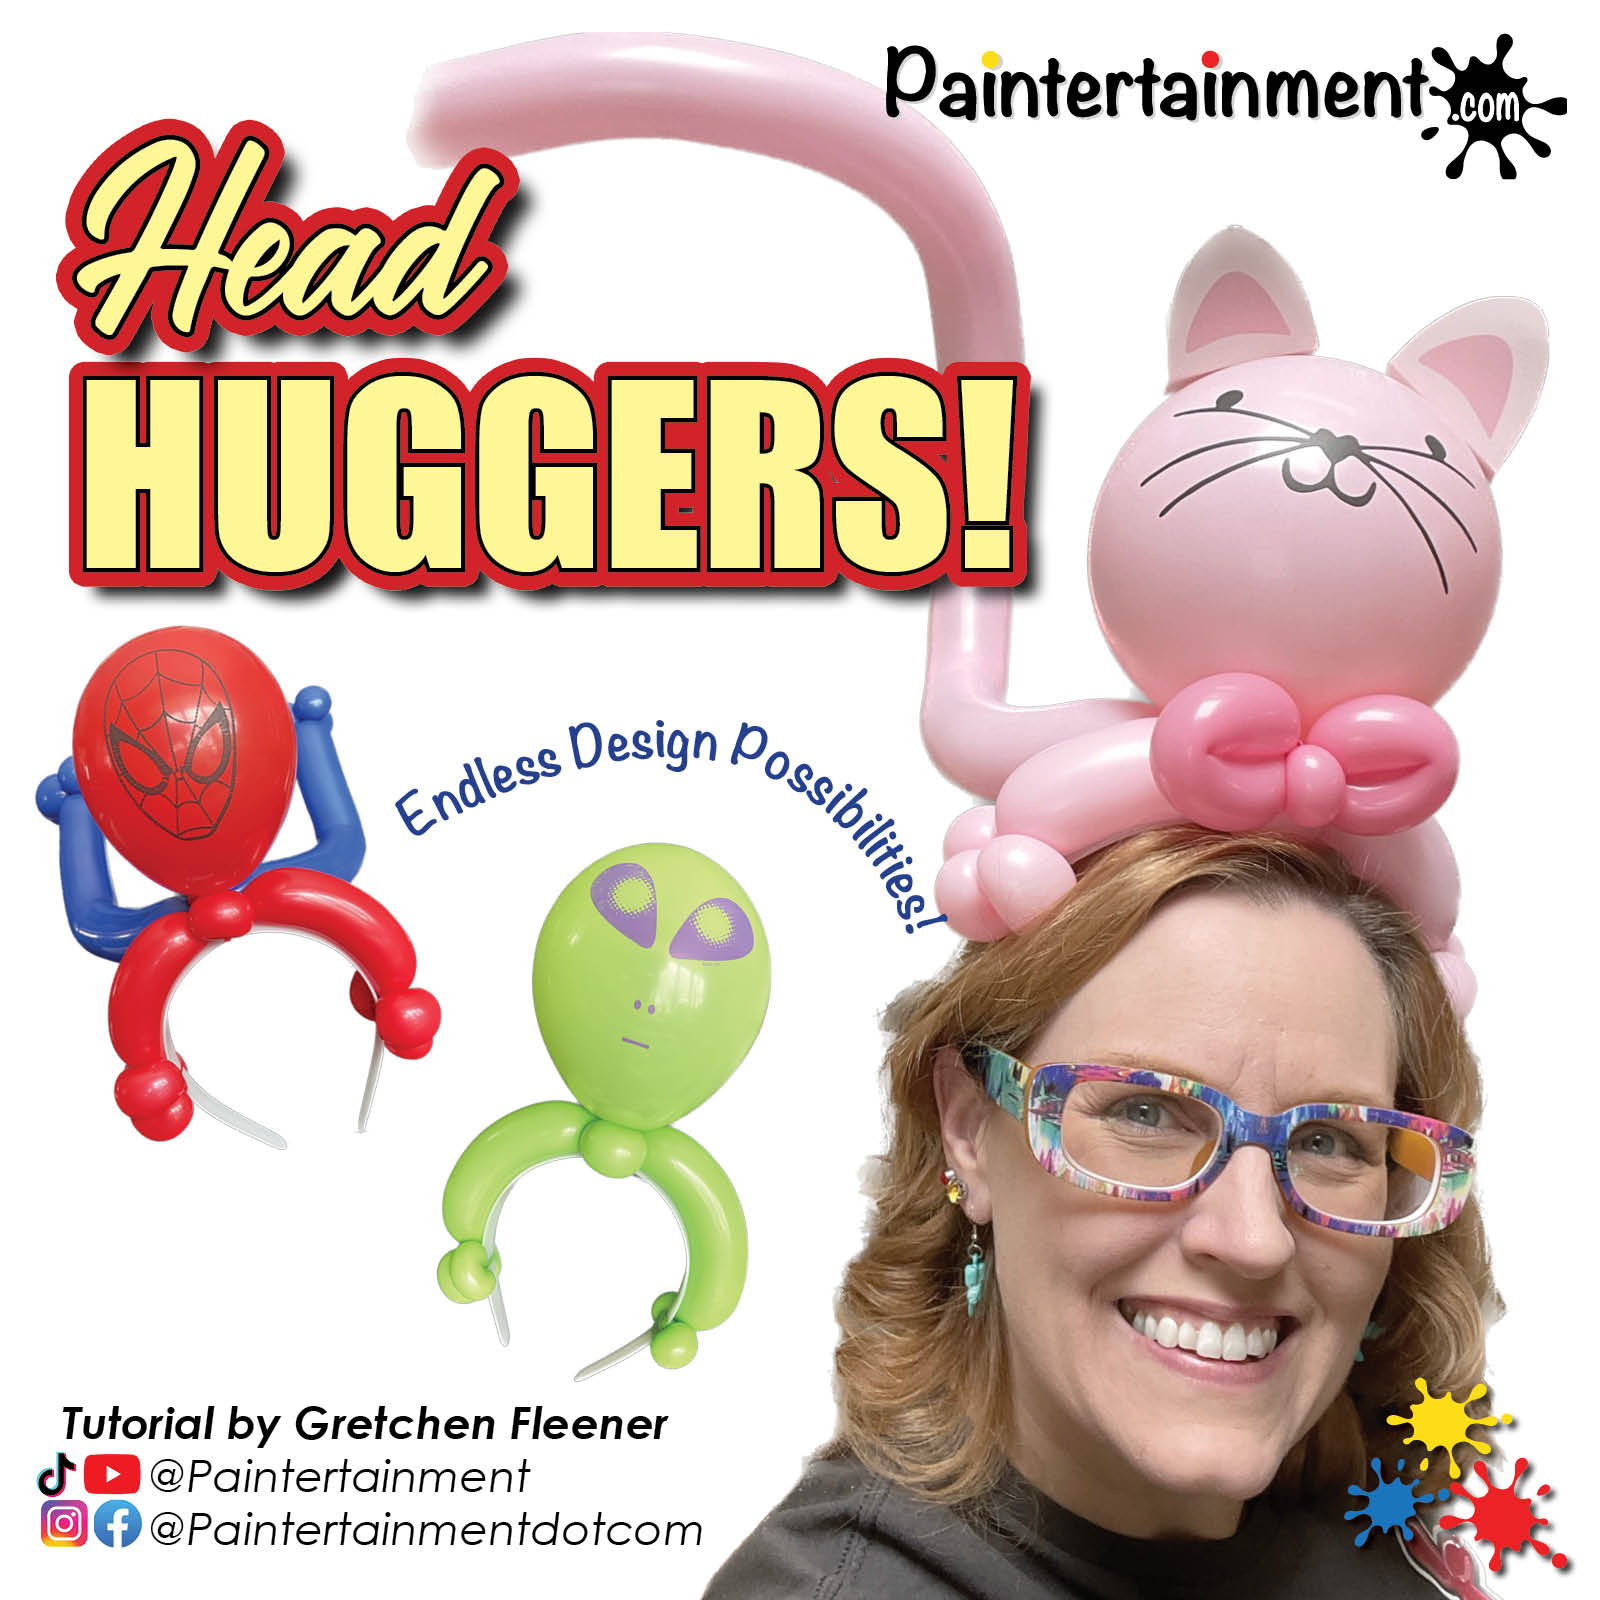

This week I came up with a fun idea for some headband balloons that I have been calling “head huggers!” These are SUPER easy and fast to make, and there are SO many possibilities to mix them up with different characters! I put together a little tutorial, and I can’t wait to see what YOU do to take this idea to the next level! Be sure to share your own creations…we love to see your work!
Since the standard heart shaped cat prints that so many twisters love to use have been hard to come by lately, I thought I’d try something different! The cat heads I used on my kitty head hugger I purchased on Amazon. They come with cardboard ears and a roll of glue dots. So for parties, what I did was cut apart pieces of the glue dot roll so I had short pieces with two dots each, stuck them in place on the ears, and then when I need to attach them at a gig, I can just peel off the backing and stick them on. I think they look pretty cute, and a great alternative to the heart shaped cats!


Today I was practicing some balloon twisting, and working on coming up with a few variations of a snail! The little orange one is just a single 160 balloon with a yellow scrap. The pink & yellow one uses two 260’s and one pink 160, while the bigger one with the chrome shell uses three 260’s and a white round!

It’s super useful to have multiple ways to make different things, not only for the ability to adjust your speed at an event, but to account for any variations in the supplies you may have packed!
It got me thinking of course of how we do this same thing with face painting. I can do a quick cheek art version of something, a more detailed half-face, or a full face, for many of my designs! So I thought I’d put together a little video of the amount of variety you can achieve JUST within the CHEEK ART category alone! Here I start with s super fast snail that is made up of one pounce of a dauber and three teardrops! I then go on to add a little more detail, stepping it up with google eyes, and finally with more shading and festival glitter! The variations are endless, but I hope you enjoy this little sampling of speedy snails!

The snowfall here in Minnesota the past couple of days has been MAGICAL! My favorite kind…the thick, fluffy kind that falls slowly like a snow globe and sticks to the branches, making everything look like a fairy land! Here are just a few pics I took in my yard:


Today felt like just the perfect photo backdrop for me to paint a little snowball juggling snowman idea that I drew in my sketchbook during my paint jam earlier this month!
Here’s a little time lapse tutorial!


I’ve been on a google eye kick lately! Here’s a fun bat design that uses “human-style” google eyes! These eyes have fun colored irises, as opposed to your typical google eyes with just a black “pupil.”

Step 1:
Load a 3/4″ angled or flat brush with a pink & purple split cake. I pulled the neon pink & purple from my Superior Sunset base blender. With purple on top, paint the outlines of the wings.
Step 2:
Use a fluffy brush to blend the pink down over the eyes, and feather the purple. I love using my Cameleon large blending brush for this!
Step 3:
Paint some pink for the insides of the ears. I left a couple little tears in the edges of his ears!
Step 4:
Add a little texture to the inside of the wings. I used my mini stencil kabuki brush and purple with a HAS 5701 stencil (from the “Alive” set) to create a little texture, and wrapped it around and under my eyes a bit.
Step 5:
Using your favorite round brush and black, paint the bat’s head, tuft of hair, and wings.
Step 6:
Using a small round black loaded with white, add a smile, fangs and highlights. I also used a halftone stencil to fade the head onto the bridge of my nose. Finish it off with google eyes applied with Pros-Aide II, and some fun chunky glitter! I used “Valley Girl” Pixie Paint!


It’s OCTOBER! We face painters LOVE October for obvious reasons! I’ve been getting my usual flood of requests for painters at events this month and am doing my best to fill them, but if you happen to be looking for a face painter for YOUR event, make sure to plan ahead! We start booking Halloween events up to a YEAR in advance! So, if you think you may be having a Halloween party even next year, make a note in your calendar at least as early as June if you’d like to book the BEST before their schedules book up!
Now that my public service announcement is aside, I thought I’d share this fun and simple pumpkin design with you! I LOVE to play with google eyes, and they look especially fun when you mismatch the colors and/or sizes.
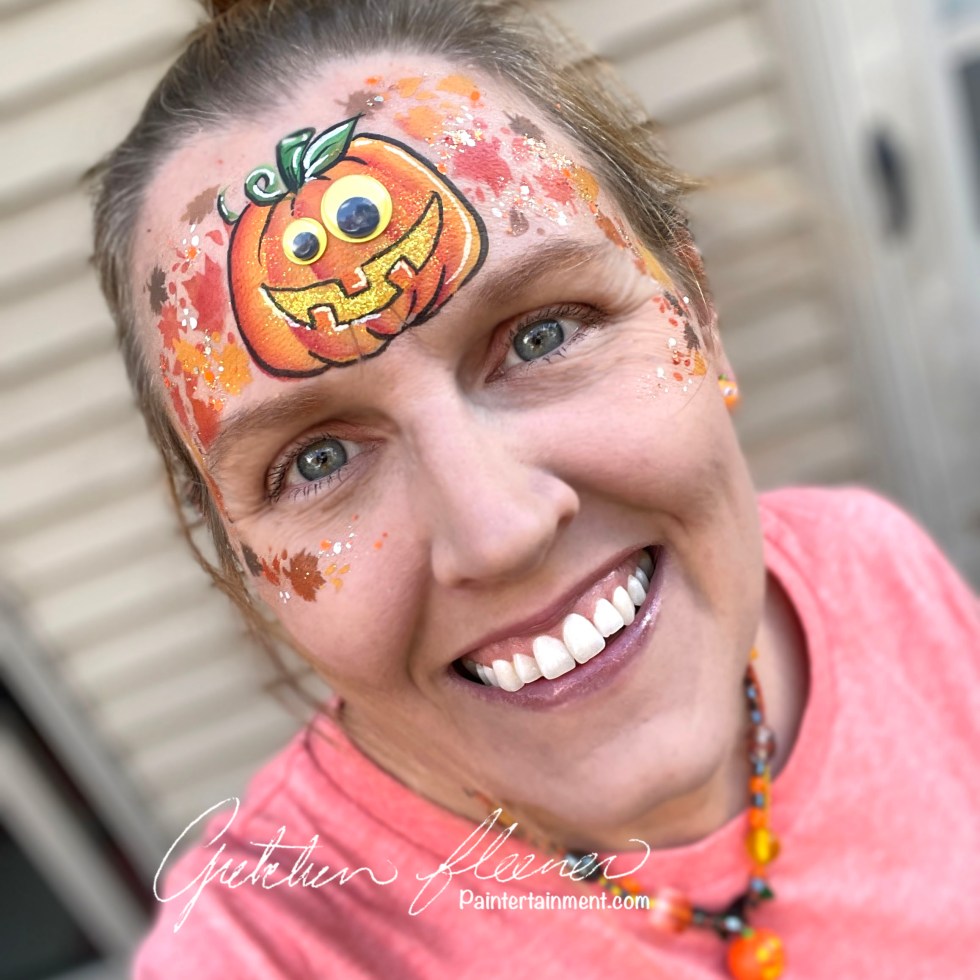

Step 1:
Load up a 1/2″ flat brush with a red/orange/yellow split cake. I used my TAG Dragon cake, and only loaded the yellow-to-red section. Paint the curved outer edges of your pumpkin, then repeat the strokes working your way towards the center. Make sure that you are consistent with which side is your shaded side (darker red) and lighter side (yellow) to get the best dimensional effect! I am assuming my light is coming from the upper right side here.
Step 2:
Use the lighter yellow corner of your brush to fill in the center area of the pumpkin.
Step 3:
Using a mini kabuki brush and an Ooh! fall leaf wrap stencil, surround your pumpkin with a variety of fall leaves! A mix of yellows, oranges, red and brown add some fun variety.
Step 4:
Load a small round brush with yellow and add a smiley mouth. I like to dab on a little yellow glitter here. Don’t worry about outlining teeth, you’ll whip those out in seconds in the next step!
Step 5:
For the teeth, just load a small 1/4″ flat brush with orange, and paint on three short strokes over the top of your mouth!
Step 6:
Outline the pumpkin with black and add a few highlights. I love Wolfe black and white for all of my outlines and highlights! Use a face wipe, Q-tip or clean dauber to remove paint on a couple spots where the eyes will stick. Apply some Pros-Aide II to these spots, and the back of your google eyes, let dry clear and stick. I use Pros-Aide II for gem clusters (original formula for glitter tattoos) because it is designed to break down easier for removal! Top. it all off with some sparkly Vivid Gleam glitter cream…I used “Trick-or-Treat!”Harvest!”


You must be logged in to post a comment.